Info: If you’re looking for a solution for Windows 10, read the article about installing unsigned drivers in Windows 10.
Meanwhile for me it’s almost impossible to live without Windows 8. I got used to the new interface and don’t want to miss it even for one day. Then, yesterday I detected a very unpleasant problem. Windows 8 just didn’t wanted to install a driver, because it was not signed. In the end it worked out. And this is how I did it.
Install unsigned driver with Windows 8
To install unsigned driver (driver which are not signed by Microsoft) in Windows 8, you have to reboot your system in a “special way” before.
Step 1:
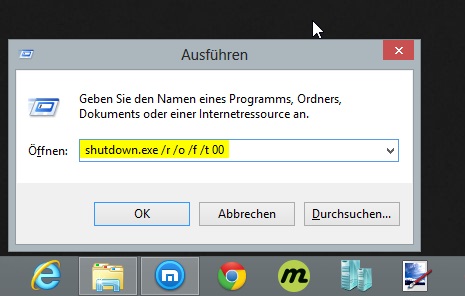
As soon as Windows 8 is ready, you need to start the Boot-Options-Menu. Therefore you need to press Win+R at the Windows 8 desktop, to open the “Execute”-Dialog. Now you have to use the following command to boot into the Options Menu:
shutdown.exe /r /o /f /t 00
Attention: When you perform this command, the PC will reboot immediately. So save all your open file and applications before you enter the command.
If you are interested in the meaning of the particular command, simply read to following explanations.
- shutdown.exe – It’s a Command-Line application which is inclusive with Windows. It does various kinds of restarts and shutdowns.
- /r – means restart
- /o – means the PC should start in the Option menu
- /f – means restart directly and all open applications will be closed automatically
- /t 00 – shows the time until the restart (in seconds). In this case 0 seconds which equals an immediate restart
Step 2:
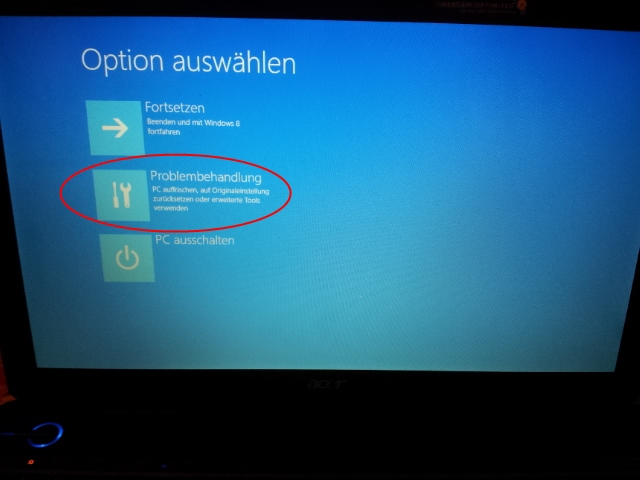
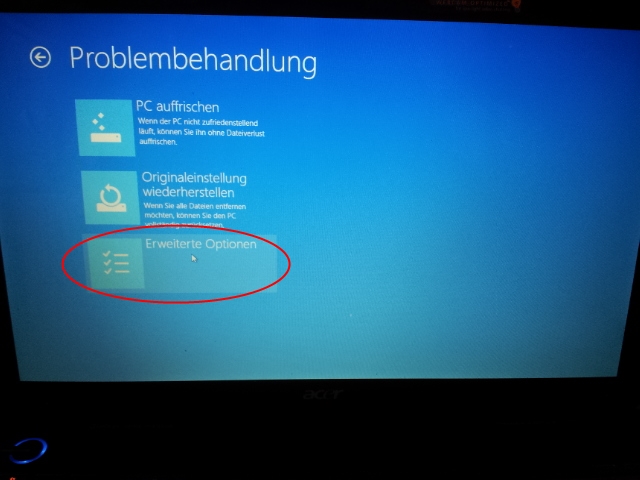
Click “Troubleshoot” and then “Advanced options” in the Option menu.
Schritt 3:
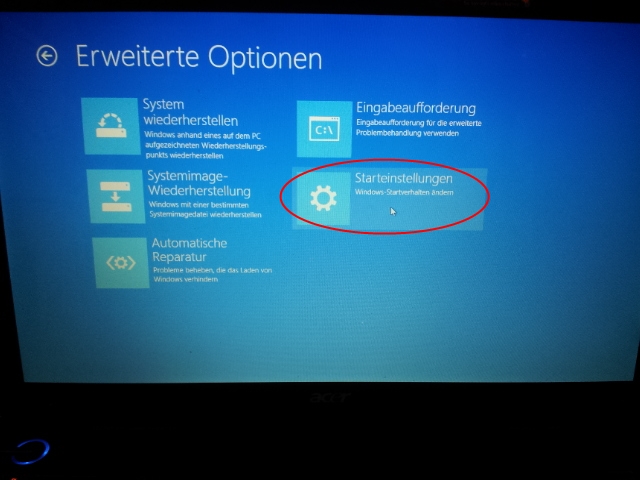

Click “Startup Settings” and “Restart”.
Step 4:
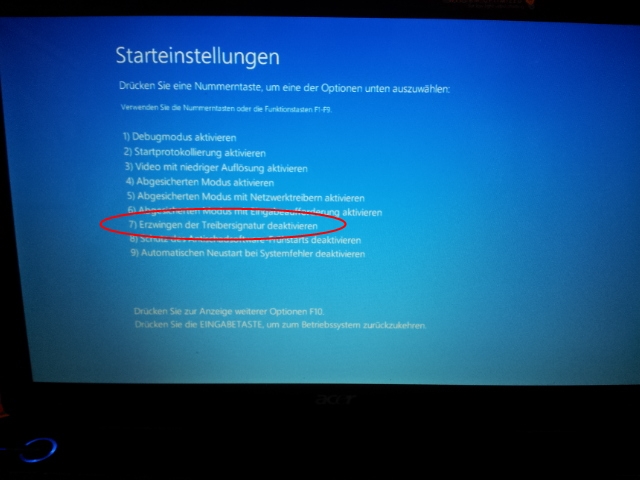
In Settings you can choose between various options, which you can validate with one click at the respective number key. We need to click option 7 – “Disable driver signature enforcement” – to deactivate the driver check.
Step 5:
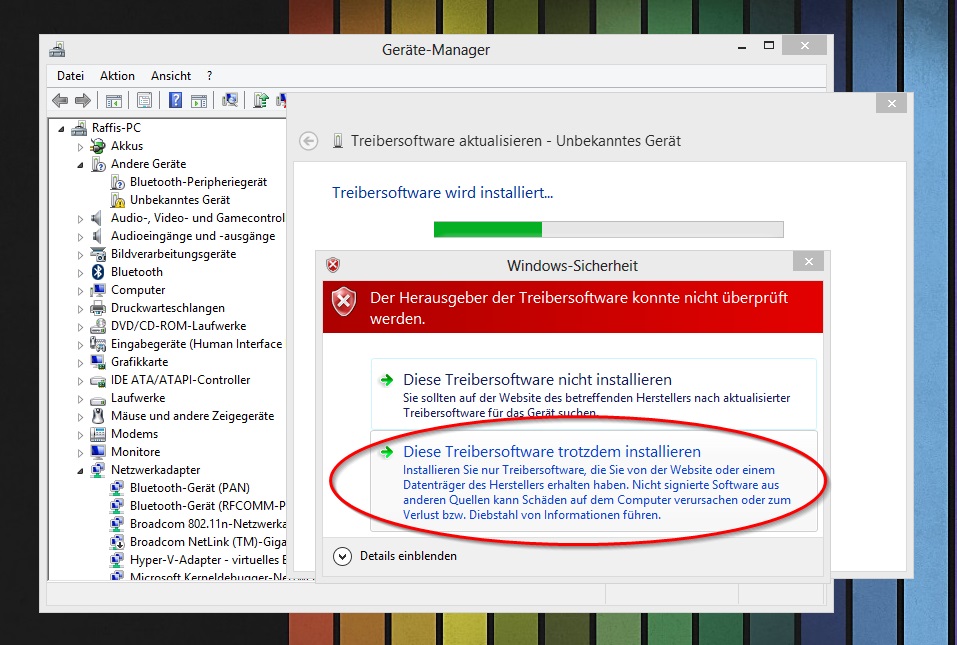
Now, after another restart, you are able to install unsigned drivers by using Windows “Device Manager”. There will be still a query in the beginning, as you can see in the screenshot above, but the installation of the driver will be possible without problems.
Final advice:
Please keep in mind that the functionality of Microsoft’s signed driver is implemented for a reason. A bad or broken driver can cause instability of the system. Therefore only install unsigned drivers if you know the source respective the publisher and you are able to evaluate the risk. If you want to be on the “safe side”, simply set an system restore point.


I really had no idea about the unsigned driver but when I read this article I got the idea so if anyone has wanted to know how to install unsigned drivers in Windows 8 then this post might be helpful for you.
These are all about some useful techniques recommended by Sign In 0x87dd0006 by utilizing that the users can easily get rid of these illegal scamp attempts by sending an email to steal the users’ sensitive information. They should be careful about their platforms.