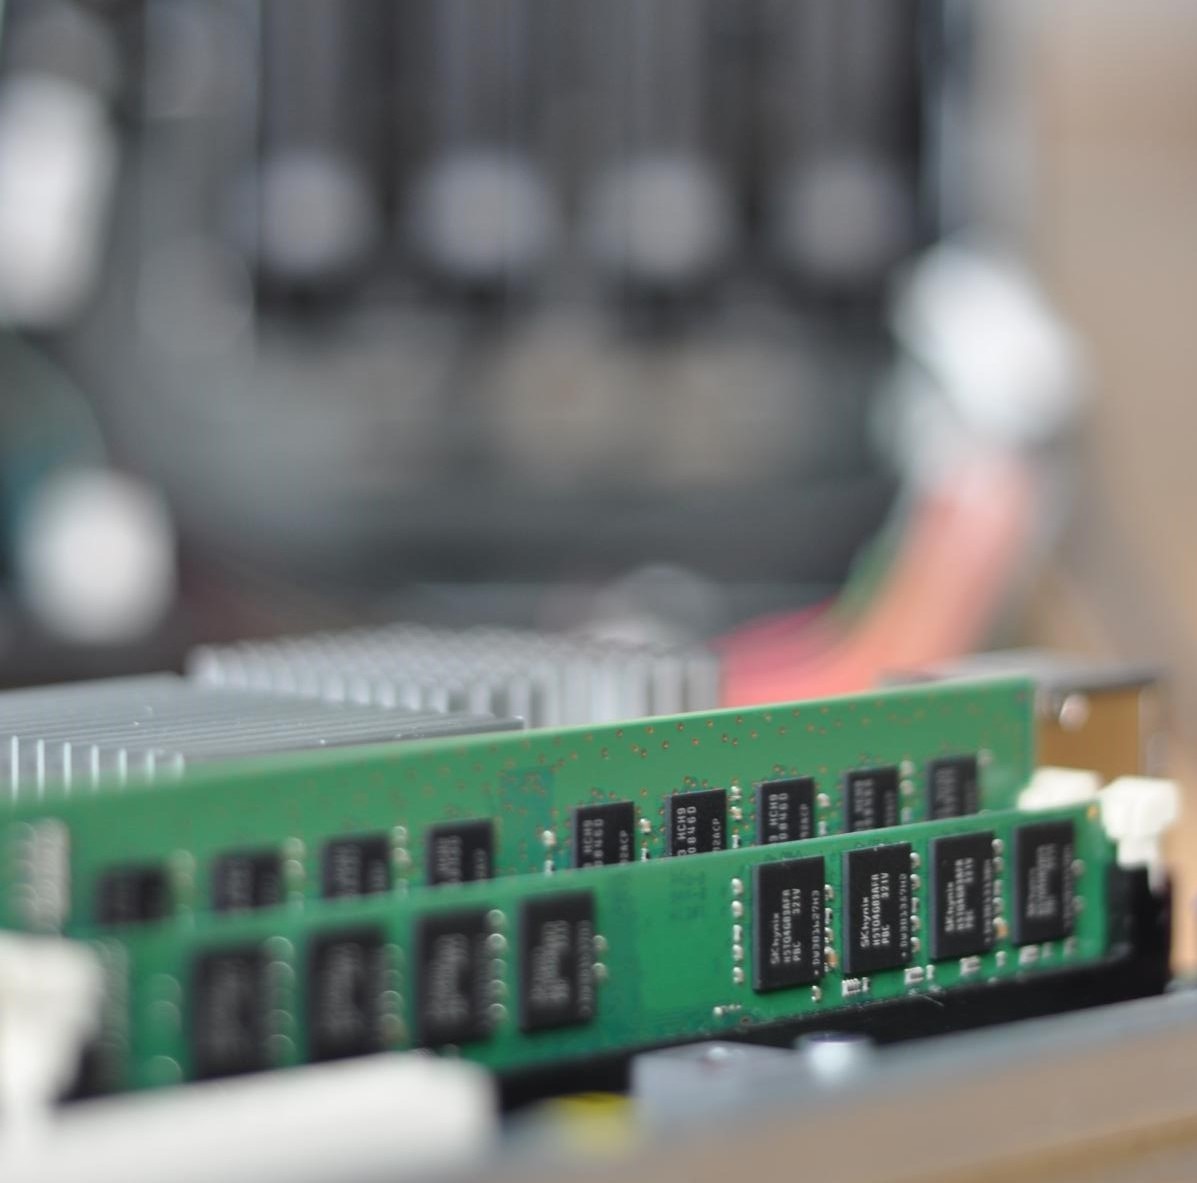
 It is a while now since my first article on my homeserver was published. Nevertheless, I promised that more would follow, and thus now follows the second article in my series on My Home Server. One of the steps to build the Home Server was the extension of the working memory (RAM). By default, the HP N54L comes with 2 or 4 GB of RAM. (Depending on which version of server you ordered.) However, since I want to virtualize more than only one machines to the server, this is somewhat limited. In this article, we extend the RAM of 4 GB (which was installed in my type of server) to 12 GB. However, since the cover of the N54L is very small, this is not an easy task. Therefore, I prepared an illustrated systematic guide. However, before we start, there are a few words to RAM itself. If you want to more than 8 GB, you have to be sure to use the appropriate memory, because the N54L does not tolerate any memory, not even if the slot (port) theoretically fits. You can find a list of successfully tested modules in this forum. I decided for the 8 GB model of Kingston: KVR1333D3N9 / 8G It runs at least in my N54L without any end.
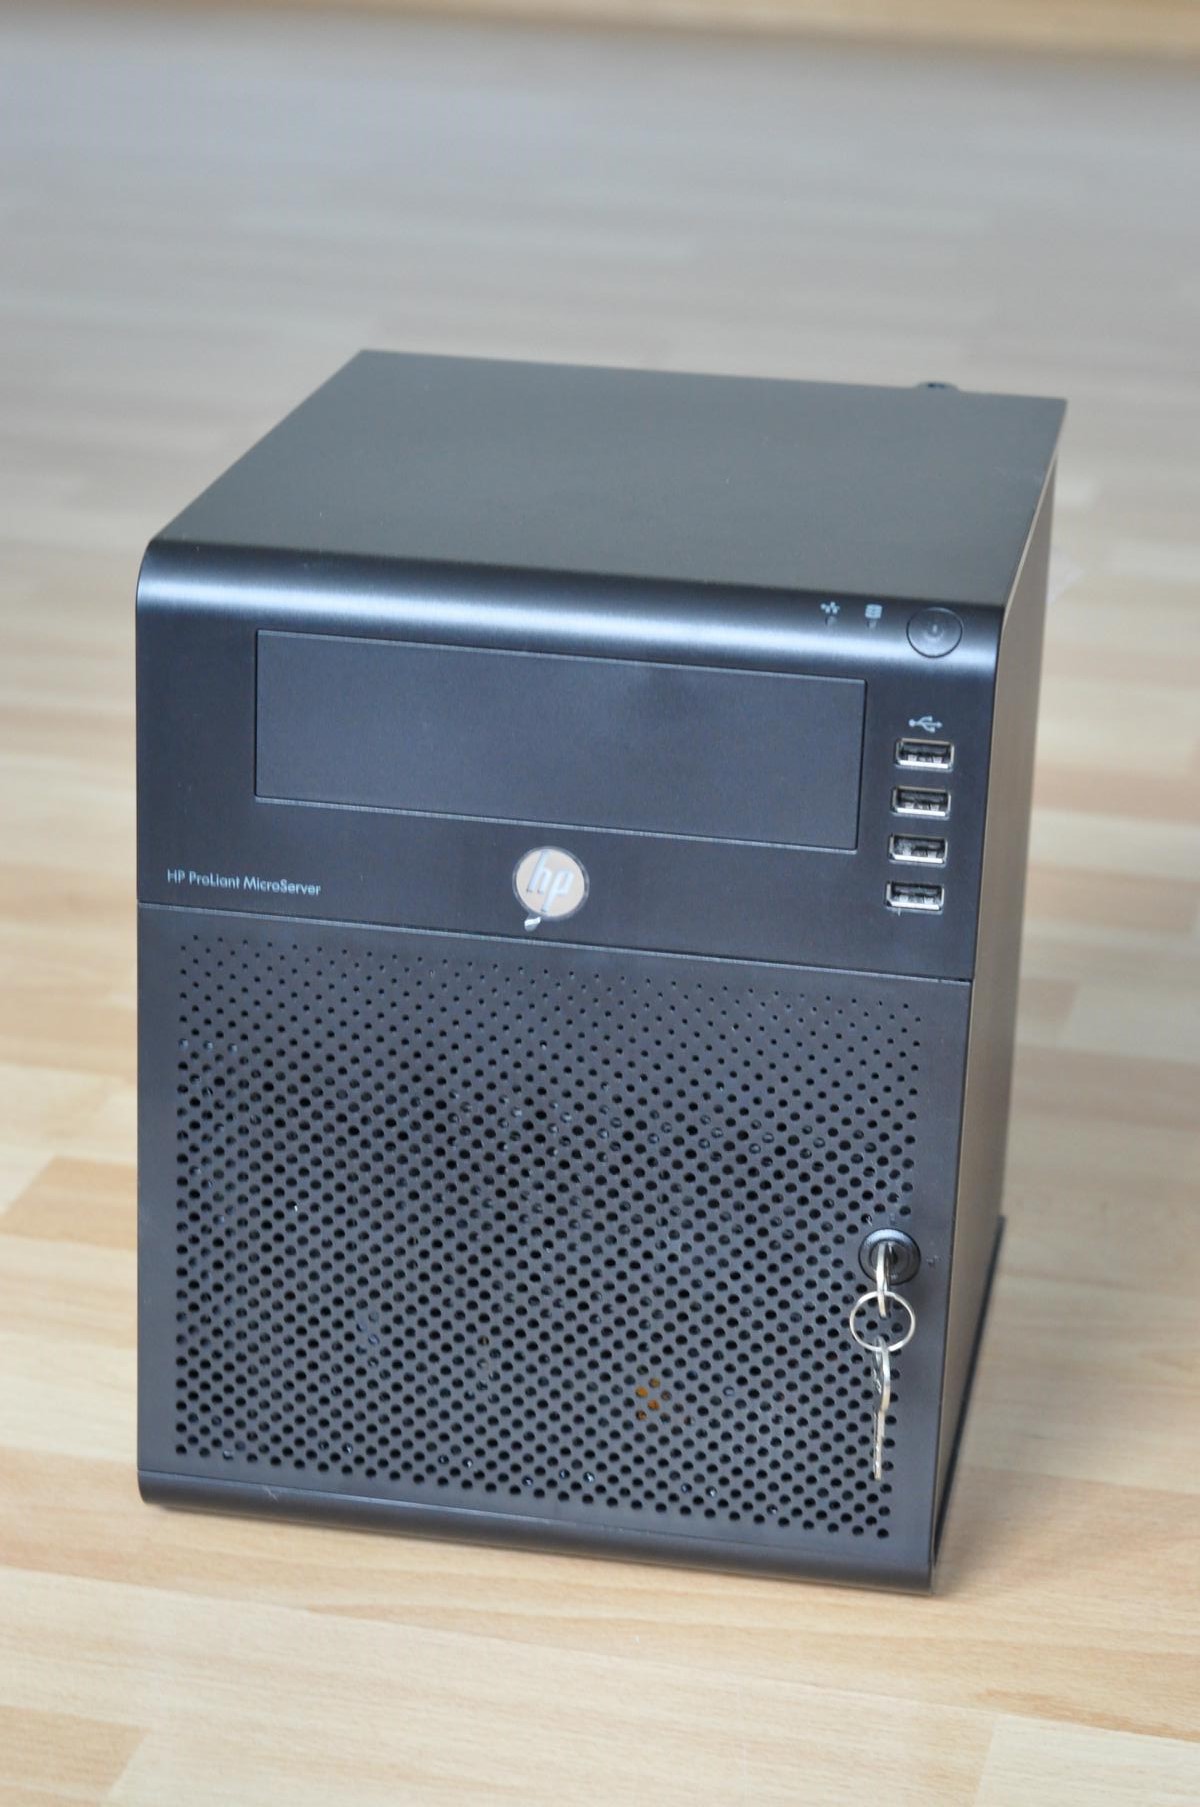
Enhancing Memory in a HP N54L
Who likes to watch videos can watch the following clip, I created for this article. Who would rather read and watch photos, scroll past the video. Finally, we come to the main topic of the article – upgrading the memory on our home server. First step we need to open the case. This goes with the small key, which you find attached to the rear of the cover. The goal is to remove the entire motherboard from the case. First, we need to remove the three cable strands from the white plastic clip on the right side of the case. Should you, like me, have an USB stick to the internal USB port, removed this now.
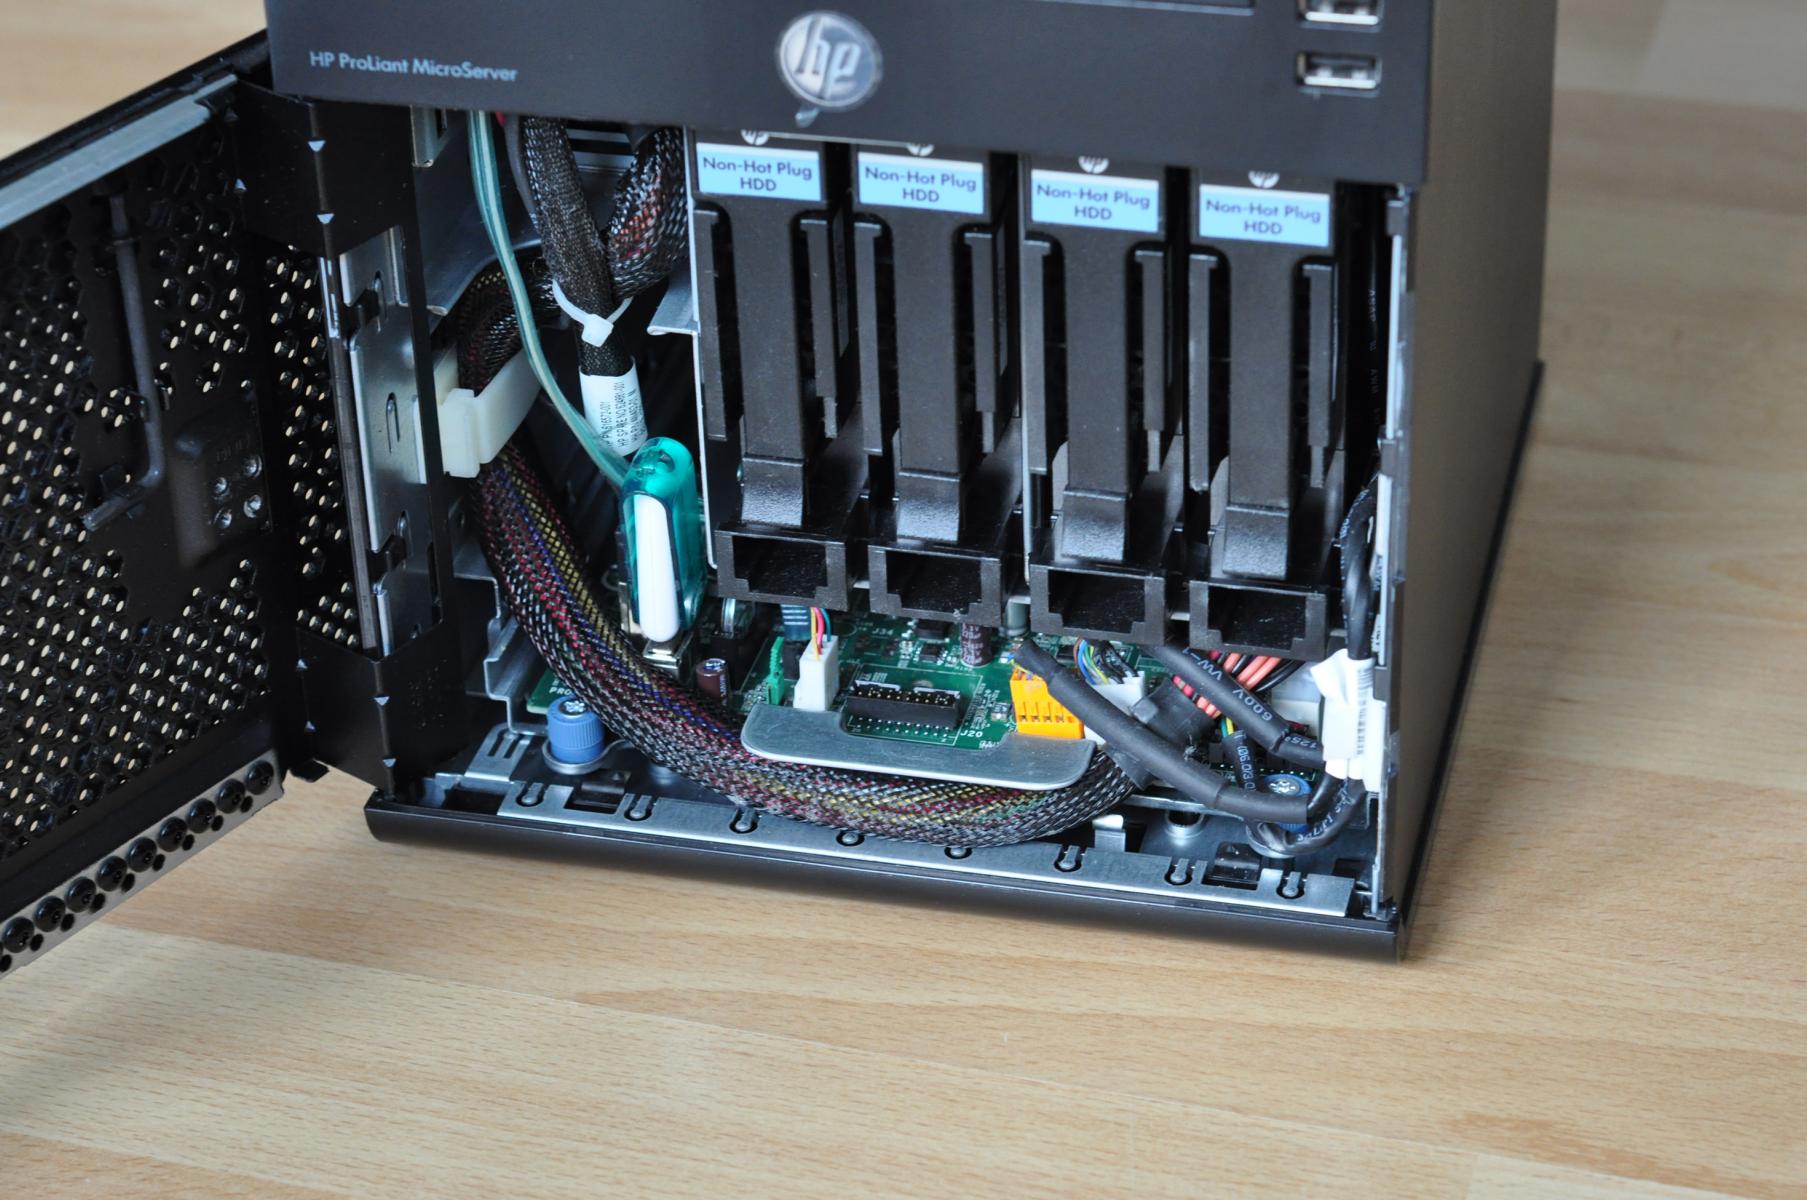
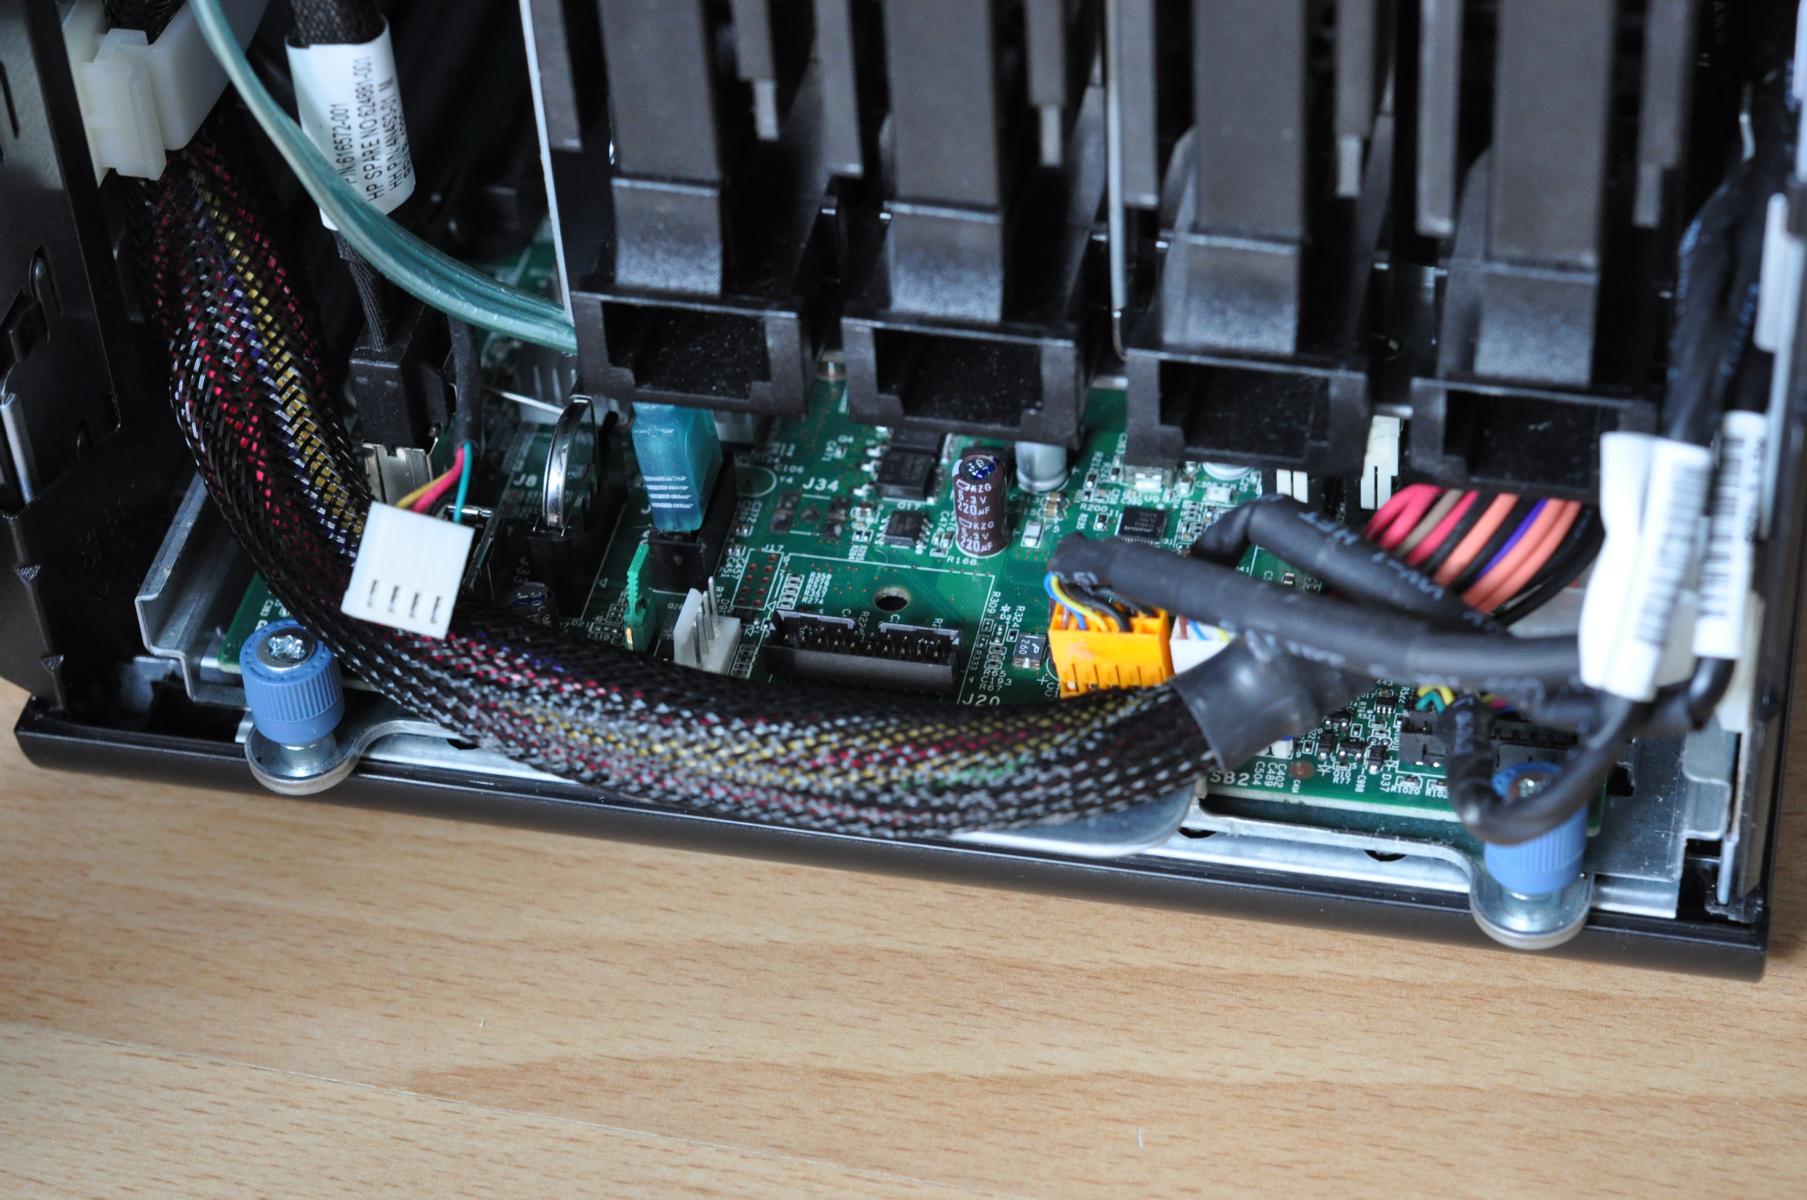
For the next step, we remove the supply from the AC adapter from the metal guide. (This is the thick wire harness enclosed in the black fishnet hose.) To remove the next cable, we have to pull the motherboard to the front. On each side of the motherboard, you can see screws with blue plastic heads. You need to remove them. Next, pull the motherboard a little bit more and release the white plug on the left side, which is located near the BIOS battery. Next you see three plugs on the right side of the motherboard (a white, a black and an orange one) remove them now.
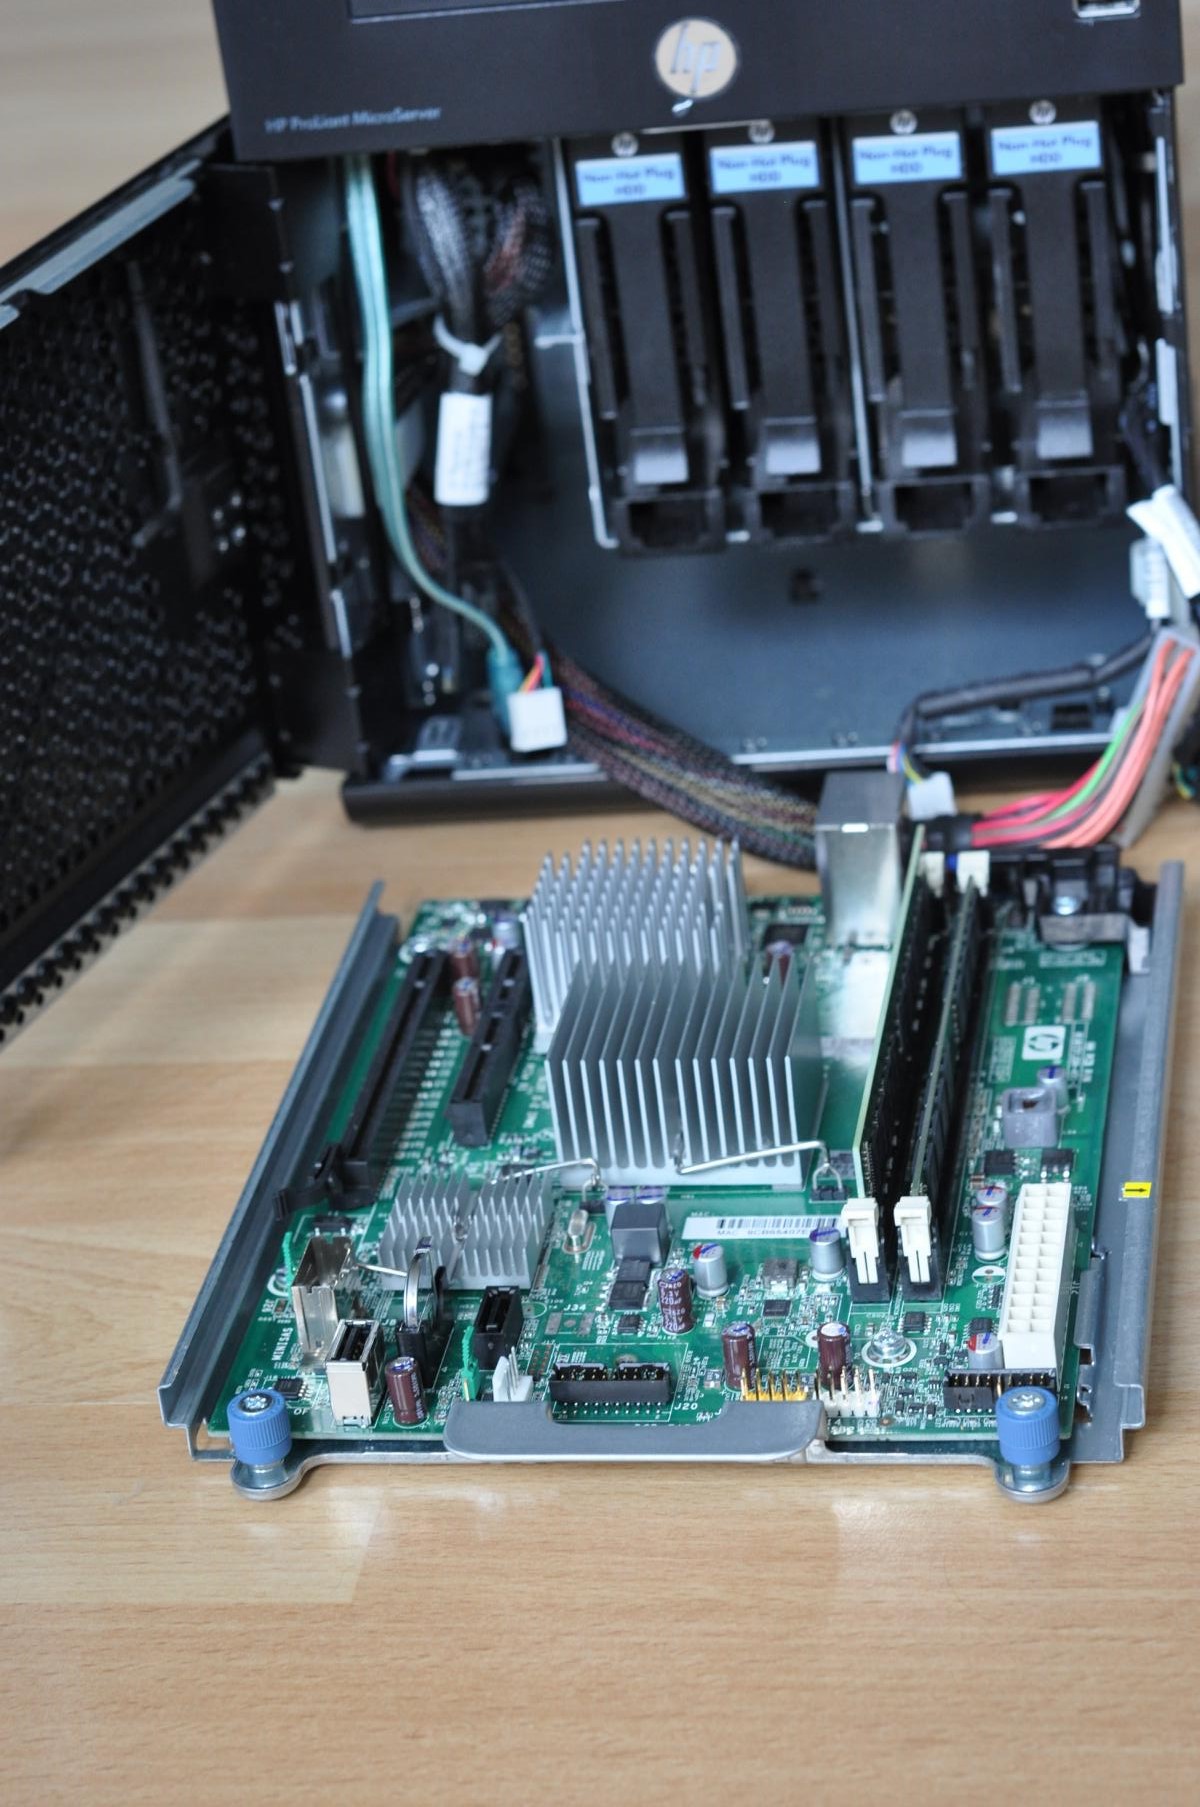
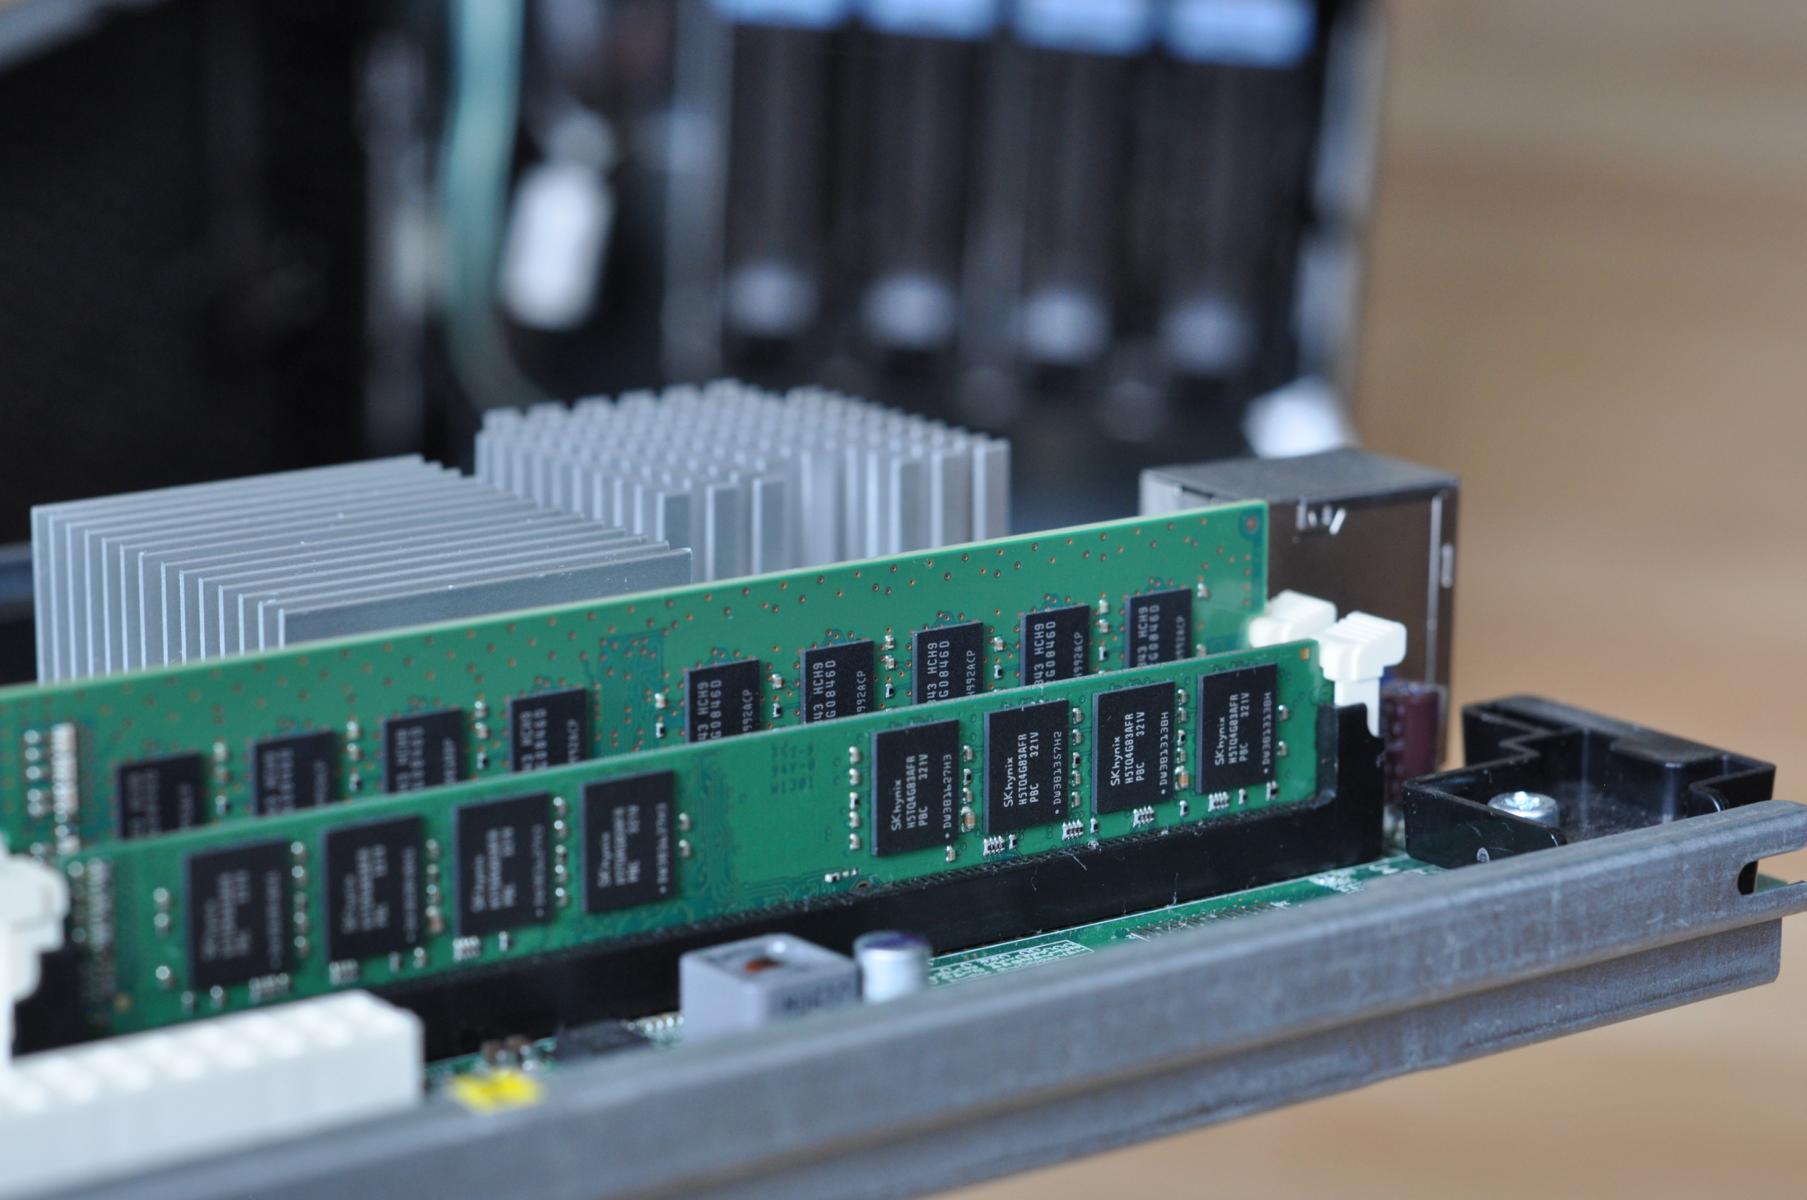
As soon as those three plugs are removed, we are close to the target. Next, you need to remove the connector from the hard drives, which is on the left behind the BIOS battery. On the plug, you see a metal plate, which must be hold down to release the plug from the socket. Now you are able to pull the motherboard a little bit more out of its cover. The final step is, to remove the plug, which connects the motherboard to the power supply. Now you can remove the motherboard from its cover and you can add or replace memory modules as desired. For the installation of the motherboard simply read the article backwards. (More precisely, you follow the steps in reverse order.)


Thanks dude, gave me the info I needed. Will hopefully have 16GB in my Microserver in a few days :)