F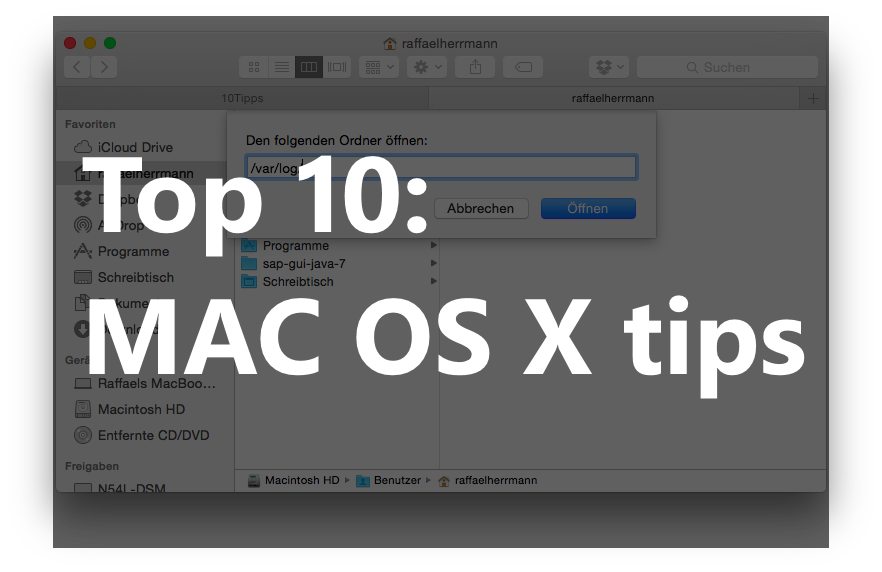 or some time now, in addition to Windows and Linux machinery, also a MacBook has been working on my study desk.
And when there is an OSX system at home, of course one gives full measure to get out the latest info from it. Many things that OSX originally has, are unknown to the majority of users. (At least this is my personal opinion, which comes from several conversations with Mac-users from my environment)
This is why today there are 10 tips for you, how to get more out of your Mac.
1) Enter a path in Finder

If you have some affinity to the console (Shell/CMD/Terminal) and know your folder hierarchy by heart, then you are for sure much quicker than those ones, who have navigate by clicking through several folders. A simple click on the address box is enough to do so in Windows Explorer.
Unfortunately this address box isn’t visible as a standard in Mac OSX Finder. However, with the following keystroke combo it’s possible to display the address box.
CMD+Shift+G
You can only insert one path of your choice in the address box. Features like the tilde ~ for the home directory and navigation, by using the TAB button, works as usual also on the terminal.
2) Setting volume and brightness in smaller steps
Thanks to the function keys it’s possible to set both volume and brightness in a quick and simple way. But if you think that the step width is too big in this case, you should use the following keystroke combo.
For volume use:
ALT+SHIFT+VolumeUp/VolumeDownFor brightness use:
ALT+SHIFT+Bright/Dark
Thanks to the use of the ALT and SHIFT keys, it’s possible to adjust volume and brightness in quarter steps, in order to make a more precise setting possible.
3) Free/Rectangular text selection with ALT
 There is another very useful key combination which you can use when working with texts.
Who has pressed the ALT key during selection, can highlight the desired text in a „free“ way. De facto this means, that one can copy any arbitrary rectangle of text instead of whole lines.
This key combination works in almost all applications that handle texts. In case of need: trying is better than studying!
If this feature seems familiar to you – the same thing works in SAP with Strg+Y.
4) Autocomplete und word suggestion
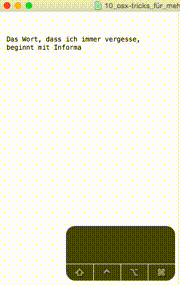
If the muse abandons you while you’re writing or if you’re not too sure about how to spell a certain word, the following feature will be your friend.
Im many text editors in Mac, such as Pages and TextEdit, it’s possible to press F5 while typing (on notebook keyboards it’s FN+F5), this way one obtains a list of suggestions of possible endings for the started word.
The whole thing reminds of the codecompletion features of current development environments.
5) Speech output with “say”
Let your MAC speak with say! With the program say any written text can be spoken out by using text-to-speech synthesis. The application is extremely simple to use.
Open up the terminal and type say + your text. For example:
say All backups finished
By using the parameter -v you can choose different voices.
Is this just dalliance? Of course this feature can be defined as something to play around with, but I think that this would be an injustice.
This is how I imagine a sensible use of this application. For example at the end of shell scripts or in connection with an Automator. This way it would be possible to be informed by a vocal message when a backup, rendering job or something similar is completed.
6) Redirecting console outputs to clipboards
As we have been talking about terminals, we immediately add another hint about it.
The two commands pbcopy and pbpaste are two additional practical helpers for the daily work with the terminal.
How you can easily guess from the names (pb=pasteboard=>clipboard) we are dealing with two helpers for copying and pasting in or to the clipboard.
Thanks to the Pipe-Operators (|) it’s possible to copy any output to the clipboard. So if, for example, you want to copy the current weather conditions in Berlin to the clipboard,you only have to use the following order
curl http://api.openweathermap.org/data/2.5/weather?q=Berlin,de | pbcopy
With pbpaste you can re-insert the text content from the clipboard to the terminal.
A last little hint : with the order pbpaste | pbcopy you can convert Rich-Text to Plain-Text.
7) Making sensible use of proxy icons
![]()
Proxy icons are another “tool” in OSX, which for sure many users have already seen, but don’t really know how to use.
Proxy icons are the little icons next to the names of the files or in the upper window-bar of a program.
If you click on the icon with a pressed CMD key, you’ll be able to directly access the folder which contains the desired file. In addition to that, it’s possible to access also superordinate directories of the file.
Another way of using the proxy icons is the usage of the Drag’n’Drop function. If you drag the icon on to another application, the file will be opened inside this app or its path will be inserted in it. (This depends on what is supported by the receiving application.)
8) Extended menus in the menu bar
In order to get more information about bluetooth, network/connectivity, volume etc., you can push the ALT button while clicking on the entry in the menu bar in the upper part of the screen of your Mac.
By doing so, for instance, you can have your IP-address displayed in the network dialog or you can choose your input/output channel in the sound dialog.
9) Screenshots per Tastenkombination
Additional software is not necessary to take screenshots in OSX, because everything that you need in order to take one is already supplied.
Thanks to the following keyboard shortcuts you can take screenshots in Mac OSX:
CMD+SHIFT+3: Save the whole screen in a file.
CMD+CTRL+SHIFT+3: Save the whole screen to the clipboard.
CMD+SHIFT+4: Save an arbitrary part of the screen in an file.
CMD+CTRL+SHIFT+4: Save an arbitrary part of the screen to the clipboard.
In the varant with the „4“ you can additionally press space in order to select the currently active window. If you chose the arbitrary selection, you can still relocate it by using the mouse and the space bar.
If you want to interrupt the shot you just have to press the ESC key.
10) Dark mode
The last trick isn’t an actual secret. But the option isn’t that easy to find. It’s all about displaying the menu bar and the dock in a dark grey color instead of the standar light grey one.
For this purpose there is the setting point „use dark menu bar and dock“ in the menu option „general settings“ in the system settings. If you activate this option, dock and menu bar will become darker.
This option doesn’t only look fancy, it also helps to protect the eyes if you often work in the dark or like to do so.
Fazit
These were 10 tricks I wanted to give you along the way. Now at the end of this article, I realize that I still have at least another 10 tips/tricks in stock.
Did you like this article? Are you interested in a sequel? If so, then show me by giving a like/+1 or tweet about it. Should you have more tips yourself, write me a comment.