 Nowadays you will hardly find a website without it. What is it what I’m taling about? Did you already guess it? I mean Like buttons, Share buttons, Like counter, avatars, etc. – if you look at today’s network landscape, it’s hard to imagine that there was a time before all that fancy stuff.
And that’s why I want to show you today how to install functionalities like Facebook’s share button, Twitter’s tweet button and counter, as well as Gravatar’s user-image service. In the following tutorial you will learn how to implement these functionalities into your website.
I deliberately say “functionality” because I do not want to show you how to use the finished and standardised components, but how to address the core functionality, so you can afterwards operate quite freely, for example in the design of the Like-counter.
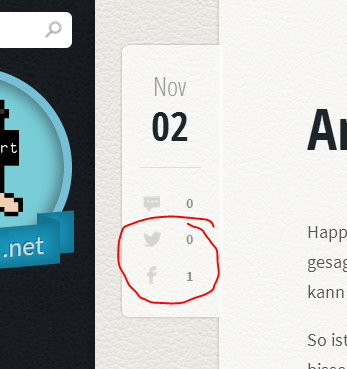
How it can look like when you are completely free in the design of the social functionality, you can see in the pictured above-left under the title of this article.
Embed Facebook share button and share counter functionalty
![]() The basic HTML construct, which we want to fill with the Facebook functionalities Share and the counter which counts how many times the page has been shared (Share-Counter), is minimal and consists in principle of only one link (<a>-tag). The reason therefore is, that we try to work on a minimal code base, so that you will get all the liberties, you need to style a really custom social button at the end of this article.
The basic HTML construct, which we want to fill with the Facebook functionalities Share and the counter which counts how many times the page has been shared (Share-Counter), is minimal and consists in principle of only one link (<a>-tag). The reason therefore is, that we try to work on a minimal code base, so that you will get all the liberties, you need to style a really custom social button at the end of this article.
The code base on which we want to back the following tutorial looks like this:
<a data-url="{url}" href="{share-url}" class="share-facebook">{counter}</a>
By clicking on the link, the current page shall be shared and therefore the Facebook sharing dialog should be opened. This can be achieved by generating an appropriate Facebook sharing url which has to contain the url of the page which should be shared in the href-attribute.
The structure of the Facebook url is built up fairly simple.
http://www.facebook.com/share.php?u={url}
Only the {url}-placeholder must be replaced with the url of the page that should be shared. We also put the url of this page in the data-url attribute of our base code, because we need it later on to display the link-counter. In the context of our example, the code might look like this now:
<a data-url="http://code-bude.net" href="http://www.facebook.com/share.php?u=http://code-bude.net" class="share-facebook">{counter}</a>
Now, if you click on the link, the Facebook share dialog should be opened, filled with the url we want to share.
To be able to show how often this website was shared already, we have to pick up the information by using the corresponding API function/webservice of Facebook. In order to keep our own website as fast and responsive as possible we should aquire the link counter data asynchronously via javascript/jQuery. If we were to obtain the data, for example via PHP, then our page could get in real trouble if Facebooks service goes down or slow. If we quire the data in an asynchronously way, the worst case would be, that we couldn’t get the share count data, but our website would stay responsive and wouldn’t be affected by Facebook’s uptime in anyway. So I think the asynchronously way is by far the better option.
The number of likes for an given url can be queried using the following Facebook API url.
http://graph.facebook.com/?ids={url}
The {url} placeholder must be replaced by the corresponding Url of the page, of which you want the Like-number/Like-count to be determined. Let’s run the query now as an example for this blog (http://graph.facebook.com/?ids=http://code-bude.net). Therefore copy it into your browsers adressbar and navigate to it. You should get the following JSON result now:
{
    http://code-bude.net:
    {
        id: http://code-bude.net,
        shares: 18
    }
}
Now we need a just a small javascript that queries the JSON object from Facebook and then takes the value of the “shares” attribute from the json response code. After that the script should write the share count value into our basic HTML construct. Therefore we paste the following code as near as possible to the closing body tag (</body>).
<script>
	$(document).ready(function() {
			$.each($('.share-facebook'), function(i, v){
		 		var url = $(this).attr('data-url');
		 		var parent = $(this);
		 		if (url !== undefined)
		 		{
		 			$.getJSON("http://graph.facebook.com/?ids="+url+"&callback=?", function(data){
		 				if (data[url].shares !== undefined)
		 				{
		 					parent.text(data[url].shares);
		 				}
		 			});
		 		}
		 	});
	});
</script>
This script goes through each HTML element which contains the “share-facebook” class. Finally, we can have even more than one Facebook Share button on our website, so we have to iterate through all of them. For each button / link we read the corresponding url from the data-url attribute, create the Facebook API request url by using the url from the data-url attribute and fetch the JSON object. Then we write the share count value into the respective basic HTML construct. After executing the above javascripts our original HTML construct should look like this now:
<a data-url="http://code-bude.net" href="http://www.facebook.com/share.php?u=http://code-bude.net" class="share-facebook">18</a>
We’re done. Now it’s time to style and extend our basice code by using CSS and HTML. Feel free to build your personal Facebook share button, the way you like it!
Embed Twitter share button and share counter functionalty
![]() Integrating the Twitter share functionality is on many points similar to the integration process of the Facebook share functionalities.
Integrating the Twitter share functionality is on many points similar to the integration process of the Facebook share functionalities.
So we can start with nearly the same code base which we have used earlier in the article.
We start again with a minimum basic HTML construct that consists only of a link (<a>-tag). The code we start with is as follows:
<a data-url="{url}" href="{share-url}" class="share-twitter">{counter}</a>
In order to built the functionalty which brings up the share (tweet) window, we need to generate a customized API url here again. Twitter, however, is a little bit different to Facebook in this point. So we could add a whole text instead of a single url to the dialog. The basic structure of Twitter’s API url looks like this:
http://twitter.com/share?url=/&text={url/nachricht}
The {url}-placeholder must be replaced by the url or any text message you want to show in the share dialog. However, Twitter only accepts this text block if it is url encoded. For this example I refer to the PHP function “urlencode()”. But if you want you could also use the javascript urlencode function or any equivalent function which does the same job. For this tutorial we want to share the url to my blog. Because it’s possible we add just some text to the tweet. So we replace the {url}-tag with the message and the url to this blog. After that we add only the url of this blog to the data-url attribute. The data-url tag will help us to get the amount of tweets later on in this tutorial. So if we have replace the placeholders, the code should look like this:
<a data-url="http://code-bude.net" href="http://twitter.com/share?url=/&text=<?php echo urlencode('Share-Button Tutorial - gelesen auf http://code-bude.net'); ?>" class="share-twitter">{counter}</a>
Thus we have the Twitter’s tweet functionality implemented now.
Again we need a little javascript in the footer of our website, to load and display the number of tweets/shares. By using a javascript in the footer we can get the share information in an asynchrony way and ensure in the same moment, that our website’s loading times can’t be effectively influenced by the availability of Twitter’s service.
We can obtain the number of tweets by using the following url:
http://urls.api.twitter.com/1/urls/count.json?url={url}&callback=?
At this point we have to replace the {url}-placeholder by the url of the page we want to find out its share count. For a test we substitute the placeholder by the url of this blog (http://urls.api.twitter.com/1/urls/count.json?url=http://code-bude.net). If we query/load this Twitter API url, we get the following result:
/({"count":35,"url":"http://code-bude.net/"});
Now we need again, as we also needed in the above Facebook variant, a small Javascript that querys the Twitter webservice, parses the JSON object and writes the value of the “count” property in our basic HTML construct.
<script>
	$(document).ready(function() {

			$.each($('.share-twitter'), function(i, v){
 		 		var url = $(this).attr('data-url');
 		 		var parent = $(this);
 		 		if (url !== undefined)
 		 		{
						$.getJSON("http://urls.api.twitter.com/1/urls/count.json?url="+url+"&callback=?",
				  function (data) {
		     			    if (data.count !== undefined)
 		 				{
 		 					parent.text(data.count);
 		 				}
					});

	         		}
		 	});
	});
</script>
The script goes through all the html elements whose class-attribute contains “share-twitter”. For each of these elements we read the divided url from the data-url attribute, generate Twitter’s API url and pick up the JSON object, which contains the number of tweets/shares. Then we write the amount of shares into our HTML code. If all goes well, our HTML code should look as follows.
<a data-url="http://code-bude.net" href="http://twitter.com/share?url=/&text=<?php echo urlencode('Share-Button Tutorial - gelesen auf http://code-bude.net'); ?>" class="share-twitter">35</a>
Just like in the Facebook variant, this HTML code construct can now be rearranged and expanded with CSS code. It’s time for your creativity – style it your way!
Get user images via their e-mail addresses
![]() When your website has a comment function or even its own community area with user profiles, you can make use of the services from Gravatar.com. On Gravatar internet users can sign in with their email address, upload a profile picture and connect their e-mail-address to this profile picture. Again all sites, which implemted the Gravatar service, can now query Gravatar for profile pictures by giving a user’s e-mail address as matching parameter. So for example if you have a comment box on your site where “e-mail-address” is a mandatory field, you can use this e-mail-address to query Gravatar and show a nice profile picture beneath the user’s comment.
When your website has a comment function or even its own community area with user profiles, you can make use of the services from Gravatar.com. On Gravatar internet users can sign in with their email address, upload a profile picture and connect their e-mail-address to this profile picture. Again all sites, which implemted the Gravatar service, can now query Gravatar for profile pictures by giving a user’s e-mail address as matching parameter. So for example if you have a comment box on your site where “e-mail-address” is a mandatory field, you can use this e-mail-address to query Gravatar and show a nice profile picture beneath the user’s comment.
The query of the profile image is relatively simple. This requires only the following url will be provided with parameters:
http://www.gravatar.com/avatar/{md5-email}.jpg?s={size}&d={fallback-img}
I would like to briefly explain the three parameters that are necessary for the above example.
{md5-email}: Corresponds to the MD5 hash of the email address of the user / the commentator
{size}: The edge length (in px) of the user image, so you can have it delivered in a fitting (square) size.
{fallback-img}: Url of an image that should be displayed if there’s no mach to the given e-mail address.
A sample call might look like this:
http://www.gravatar.com/avatar/e02892eff1253a127dc8e0f28e1d630f.jpg?s=80&d=http://code-bude.net/wp-content/uploads/2011/05/PICT2290_-300x199.jpg
This address can now be specified in the src attribute of an image to display the Avatar.
<img src="http://www.gravatar.com/avatar/e02892eff1253a127dc8e0f28e1d630f.jpg?s=80&d=http://code-bude.net/wp-content/uploads/2011/05/PICT2290_-300x199.jpg" />
Fazit
With little effort you can upvalue your website with a few “social components” which are really individual. If there are any questions come up during the reading of the article, just write me a comment.


