 As the one or other may have noticed, en.code-bude.net is running strictly via HTTPS protocol since some days. All requests via HTTP protocol will be redirected to HTTPS. How exactly the switch from HTTP to HTTPS for code-bude.net was realised and what things to have in mind, I want to explain in the following article.
This article shall show you how to change your WordPress blog setup from HTTP to HTTPS. As a basis for the article I used my setup, which consists of a VPS (virtual private server) with runs Ubuntu Server as operating system and Apache as a web server.
To give you a better overview, I divided the article in the following parts:
- Why you should use HTTPS for a WordPress blog?
- How to install Certbot and generate SSL certificates
- Automatically renew SSL certificates with Certbot
- Configure Apache to use Let’s Encrypt certificates
- Switch WordPress to HTTPS
- Tools and tricks after you switched to HTTPS
But let use clarify the question about the “why” first…
Why should I use HTTPS for a WordPress blog?
To better understand why I switched to HTTPS and why I consider this step made sense, I listed (my) pro and con arguments below for you.
Advantages:
- Encrypted data transfer between server and client
- “Trust-sign” and positive ranking signal for Google
Disadvantages:
SSL-certificates cost an annual feeYearly renewal of the certificates is annoying- Compared to HTTP, HTTPS has a slightly larger protocol overhead and is accordingly (minimal!) slower
 If someone asks why the first two contra-points are crossed, that is because by the use of Let’s Encrypt they became obsolete. Let’s Encrypt SSL certificates are free and once configured and embedded in a toolchain, they renew itself.
Thus only the argument of a minimally larger amount of data and computing time remains on the cons side. Compared with the safety benefits and the positive ranking signals this last disadvantage is negligible in my opinion.
So that we have the motive clear now, we can deal with the implementation.
Let’s Encrypt and the Certbot
Let’s begin with the second step of our tutorial. In this part we will configure Certbot, a small but useful comandline tool which helps us handling the SSL certificates. Certbot not only takes over the SSL certificate generation but also the renewal process.
You can download Cerbot via its official website. On the Cerbot homepage you have to specify the operating system as also the webserver software you use on your server. After that the correct install command will be shown on the website.
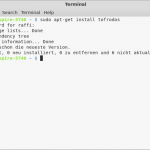
For my server setup (Apache2 and Ubuntu 14.04 LTS) the installation command (which has to be executed via SSH terminal like Putty) is as follows:
cd /usr/local/sbin/
wget https://dl.eff.org./certbot-auto
chmod a+x certbot-auto
The first line changes the working directory to /usr/local/sbin (the directory which contains user scripts and programs which shall run with system aka root rights). The second line downloads the Certbot binary via the wget download tool and the last line changes the rights of the binary, so that it can be executed. (Or in simple words: chmod a+x makes the binary “runable”.)
Now we can create one (or more) SSL certifactes by using Certbot. The syntax is explained below.
/usr/local/sbin/certbot-auto certonly -d code-bude.net
We run Certbot by calling the cerbot-auto binary and tell it, that it should create just the certificates by adding the certonly-option. The -d-parameter tells Certbot for which domain it should create the SSL certificates.
If everything went fine you should find a subfolder with the name of your domain(s) inside the /etc/letsencrypt/live directory. This subfolder should contain the SSL certifcate, the keyfile as also the keychain-file.
In theory Certbot should be able to automatically setup your Apache configuration. In my case this autoconfiguration didn’ work. (Maybe because I’m using a relatively complex vHost setup.) After generating the certificates you should ensure that Certbot didn’t mess up your Apache vHost files.
In this tutorial we will setup the Apache configuration manually. That’s because I don’t trust tools which “automagically” edit important config files but don’t tell the user what exactly they changed.
Automatically renew Let’s Encrypt certificates
 Althoug the Let’s Encrypt certificates are free of charge and meanwhile accepted by the majority of all all browser, they have one slightly “disadvantage”. Let’s Encrypt certificates are only valid for three months. After that period they have to be renewed.
In theory this is an annoying task which can have serious negative effects on your website. Because if you forget to renew the certificate your users will get a big fat red warning in their browser and leave your website which will (in long term) result in a loss of rankings in Google.
But as I told you in the beginning of this article this isn’t a valid disadvantage because we can automate the process of certificate renewal and so bypass all this serious problems.
For the automatic renewal we can use Certbot too. At first you should run the following command:
/usr/local/sbin/certbot-auto renew --dry-run
The command cerbot-auto renew tells Certbot to check if a certificate has to be renewed and if so, to renew it. The parameter –dry-run ensures that certificates won’t be renewed actually, but to probe if a renewal would be successful.
If the “dry-run” ran successfully, we can create a job which runs the renewal command in production mode on a daily base. Therefore we create a new entry inside the crontab.
Ideally you schedule this job twice a day and not at the top of hour. (The exact minute when the job should run doesn’t matter. By planning the job not on the full hour we try to avoid load peeks for the Let’s Encrypt servers. )
By executing the following commands we can create the new renewal job inside the crontab:
crontab -e
13 */12 * * * /usr/local/sbin/certbot-auto renew >/dev/null 2>&1
[Strg+X]
By using crontab -e we open the crontab in edit mode. After that we create the Certbot call at the end of the file and finally close the document by pressing crtl+x.
My renewal check runs twice a day on the 13th minutes of an hour. If you like to schedule another intervall, but have problems with the crontab syntax just try a crontab generator like this.
Add SSL certificates to Apache vHost file
Now that we have created the certificates and also have ensured, that the certificates will be renewed automatically, we have to setup Apache to use our new certificates.
If you have never run your Apache in SSL mode you should read the following steps carefully. If you already run one or more websites/vHost via SSL you can skip the following basic configuration and continue reading at the vHost-file part.
At first you have to tell Apache to listen on port 443 (which is the standard HTTPS port). Therefore open the /etc/apache2/ports.conf file in an editor of your choice and add the following line below the Listen 80 entry.
<IfModule ssl_module>
    Listen 443
</IfModule>
After that, activate Apache’s SSL module and reload the Apache config by using the following commands.
a2enmod ssl
service apache2 force-reload
Advice: If you’re using a firewall, keep in mind to open port 443.
Now your Apache server is ready for serving websites via HTTPS. In the next step we have to add the SSL configuration for our domain. As to that we open the appropriate vHost file with an text editor. You should find your vHost files in the following directory: /etc/apache2/sites-available/.
cd /etc/apache2/sites-available
nano code-bude.net
Inside the vHost configuration file we copy the complete VirtualHost element, replace the port 80 reference with port 443 and paste the changed block below the port 80 version.
<VirtualHost *:443>
        ServerAdmin webmaster@code-bude.net
        ServerName code-bude.net
        ServerAlias www.code-bude.net code-bude.net *.code-bude.net
        DocumentRoot /var/www/code-bude.net/public_html

        <Directory /var/www/code-bude.net/public_html>
                Options FollowSymLinks MultiViews
                AllowOverride All
                Order allow,deny
                allow from all
        </Directory>

	//Weitere Einstellungen...

</VirtualHost>
Now we have to add some SSL specific configuration between the DocumentRoot and the <Directory… line.
<VirtualHost *:443>
        ServerAdmin webmaster@code-bude.net
        ServerName code-bude.net
        ServerAlias www.code-bude.net code-bude.net *.code-bude.net
        DocumentRoot /var/www/code-bude.net/public_html

        SSLEngine on
        SSLProtocol all -SSLv2 -SSLv3
        SSLCompression Off
        SSLHonorCipherOrder on
        SSLCipherSuite ECDHE-RSA-AES128-GCM-SHA256:ECDHE-ECDSA-AES128-GCM-SHA256:ECDHE-RSA-AES256-GCM-SHA384:ECDHE-ECDSA-AES256-GCM-SHA384:DHE-RSA-AES128-GCM-SHA256:DHE-DSS-AES128-GCM-SHA256:kEDH+AESGCM:ECDHE-RSA-AES128-SHA256:ECDHE-ECDSA-AES128-SHA256:ECDHE-RSA-AES128-SHA:ECDHE-ECDSA-AES128-SHA:ECDHE-RSA-AES256-SHA384:ECDHE-ECDSA-AES256-SHA384:ECDHE-RSA-AES256-SHA:ECDHE-ECDSA-AES256-SHA:DHE-RSA-AES128-SHA256:DHE-RSA-AES128-SHA:DHE-DSS-AES128-SHA256:DHE-RSA-AES256-SHA256:DHE-DSS-AES256-SHA:DHE-RSA-AES256-SHA:!aNULL:!eNULL:!EXPORT:!DES:!RC4:!3DES:!MD5:!PSK;
        SSLCertificateFile    /etc/letsencrypt/live/code-bude.net/cert.pem
        SSLCertificateKeyFile /etc/letsencrypt/live/code-bude.net/privkey.pem
        SSLCertificateChainFile /etc/letsencrypt/live/code-bude.net/chain.pem

        <Directory /var/www/code-bude.net/public_html>
                Options FollowSymLinks MultiViews
                AllowOverride All
                Order allow,deny
                allow from all
        </Directory>

	//Weitere Einstellungen...

</VirtualHost>
With SSLEngine on we activate the SSL mode. With SSLProtocol we configure the protocols used by Apache. By adding the SSLCompression Off line we deactivate the SSL compression. this helps to avoid Crime-/Beast attacks on some older browsers which may be affected by these security flaws. With SSLHonorCipherOrder on we tell Apache to choose the used Cipher in the order we configure in this file and thereby overwrite the preferenced Cipher order of the clients. With SSLCipherSuite we configure the list of Cipher suites to be used for encryption as also their preference.
Finally we reference the actual certificate file as also the keyfile and the keychain file by using the SSLCertificateFile, SSLCertificateKeyFile and the SSLCertificateChainFile options.
Since we are ready with editing, we can close the vHost file and have to reload the Apache config.
sudo service apache2 reload
The biggest part is done. Most parts of the geeky stuff are completed. In the next step we have to configure WordPress.
How to switch WordPress to HTTPS/SSL
 Since the core work is done, we come to the “application layer” – namely our WordPress installation. To switch WordPress to HTTPS I used the following WordPress plugin: WordPress HTTPS (SSL) Plugin.
Just log-in into your WordPress backend, install the plugin linked above and activate it. After that try to open your blog’s main page.
If it comes to errors or if some parts of your website aren’t shown correctly it can be that not all of your site’s links are correctly switched to https-protocol. In this case browsers only show “secure” parts (those which are delivered via http://) of a website which then results in design errors. To correct this errors a small addition in your .htaccess file may will help you in most cases.
Therefore open the .htaccess-file which is located in the root-directory of your WordPress installation. Then add the following two lines directly below the “RewriteBase /” line:
RewriteCond %{HTTPS} !=on
RewriteRule ^ https://%{HTTP_HOST}%{REQUEST_URI} [L,R=301]
Those two lines redirect all HTTP requests to your blog to the HTTPS version. Furthermore a 301 redirect method is used, which is a “permanent” redirect, so that search engines like Google will be informed that your content from now on is available via HTTPS. Those 301 redirects should ensure, that you don’t lose your ratings in the search engines.
At this point you have mastered the HTTP to HTTPS switch. Congratulations! In the last part of this article we will talk about some last, but not even less helpful steps.
Double-check , if your SSL works without problems
 After we finished the configuration it is advisable to excute some last checks to ensure that everything works correctly. Therefore I compiled a small checklist for you:
- Open the homepage, some pages and some articles with different browsers (also with IE, even if you hate it) and see if all parts of your website are shown correct and if there are no “bad security”-alerts
- As the experiences teached me, try to write and submit a comment.
- Check your blog with the SSL labs checker for proper function. (If you followed my steps you should get an A-rating without problems.)
- If you have create a property in Google’s or Bing’s webmaster tools, don’t forget to change it or add a new property for your blog with its new https:// url.
If you have questions, feedback or some tips – just let me know via the comments function!

0 Comments