 In the following article I’ll show you how to run Android in a virtual machine on your Windows. The post may appear relatively long at first glance, but actually setting up is really easy. So don’t be daunted by the article’s lenght.
If you reach the end of the article and did all steps correctly, you can work with Windows and Android on the same machine at the same time. And now blathered enough, let’s go!
What do we need?
At first you have to install Microsoft’s Virtual PC. Therefore you have to download it (use the link from the above “What do we need?”-list ). But wait – maybe you can spare yourself the download and installation. Take a look at your Start Menu at first and search for “Virtual PC”. If you find it, you can clap yourself on the back and pick up the next step. Otherwise begin with the download and install Microsoft’s Virtual PC.
After the installation we go to the next step – let’s create a virtual machine.
 Start Virtual PC and click on the “create virtual machine” button in the menu bar.
 Enter a name for your virtual machine and choose the filepath where you like to save your machine’s data and the machine itself. (I would discourage you from pen drives as the location at this point, since they usually have too low read-/write speed to really have fun with the virtual machine.)
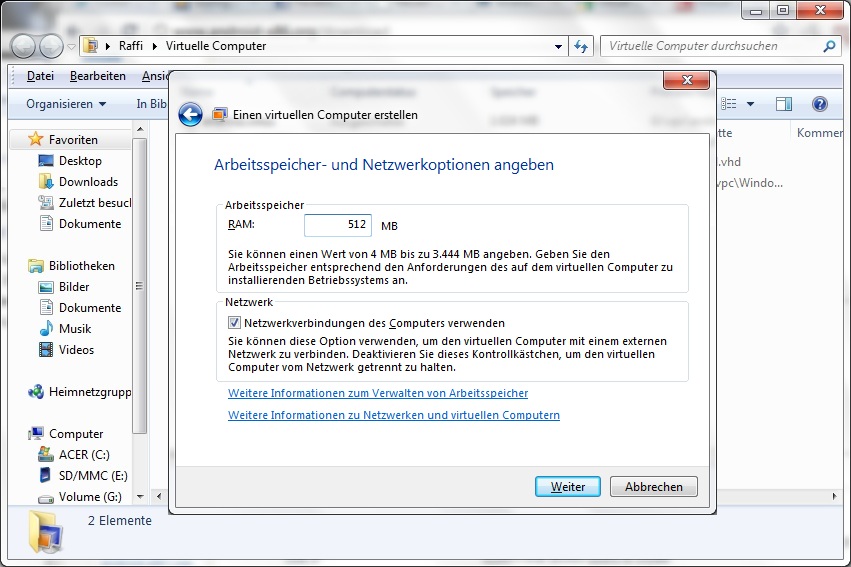 Determine how much memory your virtual pc should get. Remember – the more memory your virtual pc gets, the less memory is available for your host system! For later use with Android, you should, if possible use atleast 512 MB. 256MB would even work, but slow down the Android system.
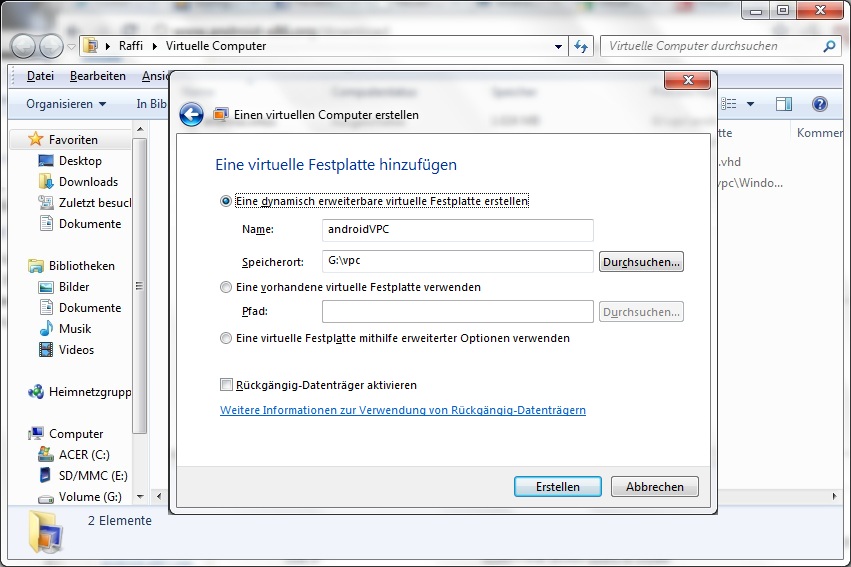 In the next step, you choose to create a “dynamically expanding virtual hard disk”.
You have come along so far? Great! Next, you have to get a copy of an image file with the modded Android X86 operating system. The download link therefore is also listed above at the “What do we need?”-paragraph. But beware, not all versions will run on any PC or notebook. In order to obtain a version that supports as many devices as possible, you should look out for the “generic” versions of Android x86.
Download finished? Then it goes on.
 Open the settings dialog of you newly created virtual machine (right click -> settings).
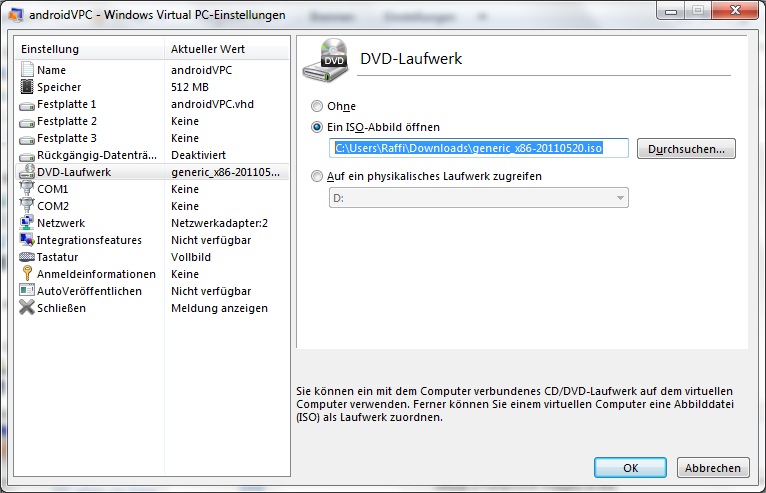 Search for the menu item which is named “DVD-drive” and choose the “ISO-image” option. Now navigate to the iso file you downloaded in the last step and select it.
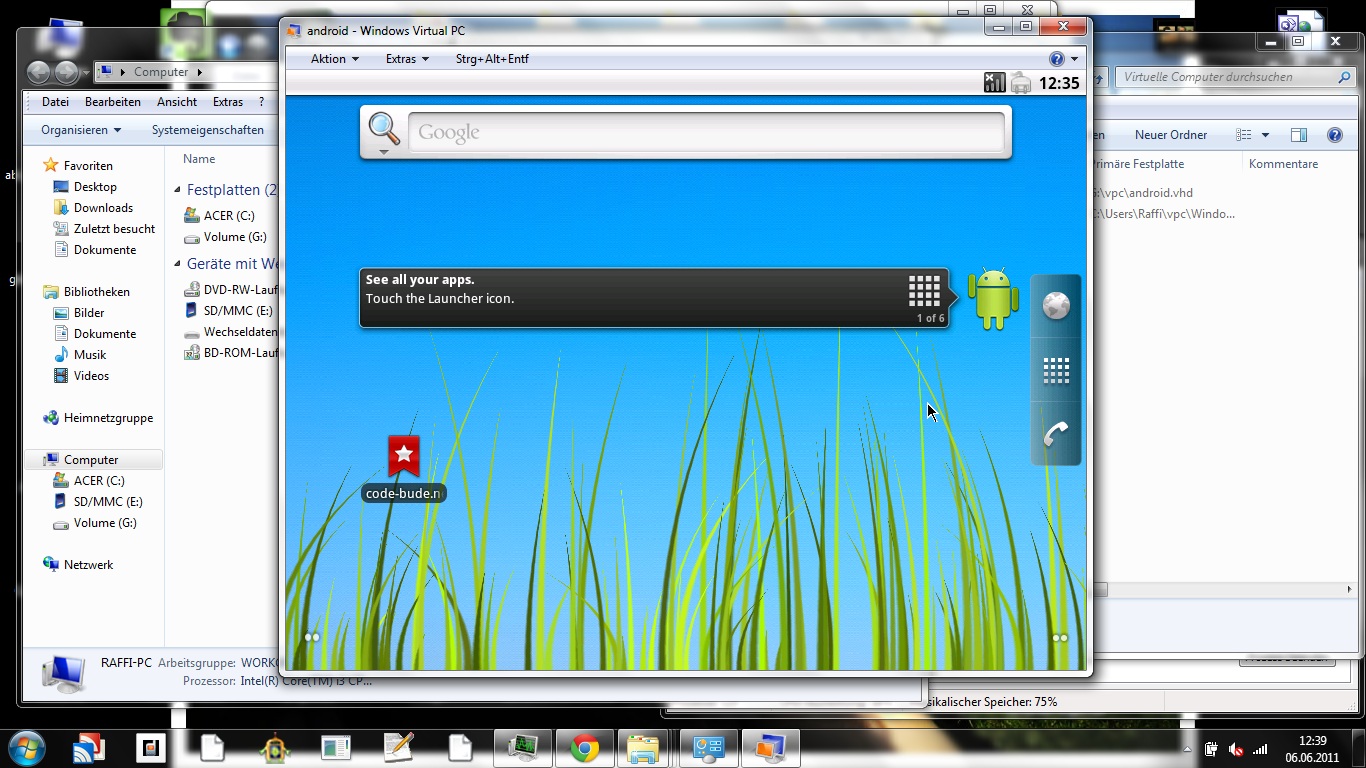
That’s it already. Close the settings menu and make a double click on your virtual PC. After a short time the following menu should appear on your virtual pc’s screen.
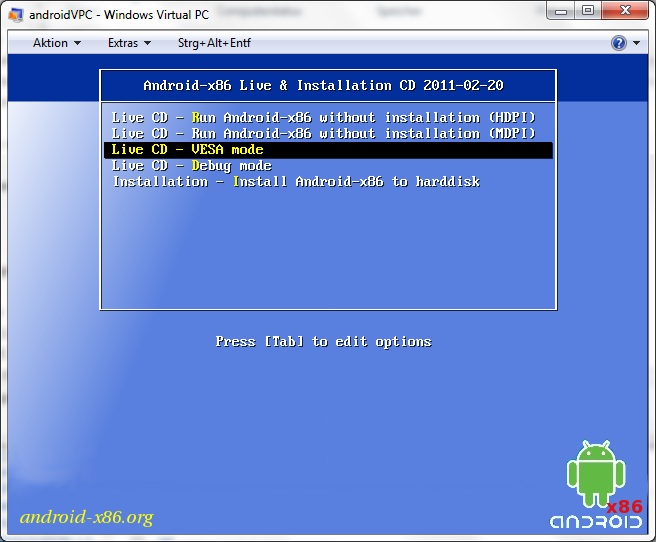 Switch between the three modes graphic modes and try to find the one which works fine for you. On the most PCs, only the third mode (VESA) will work fine. Although these do on the largest hardware compatibility, it offers a weaker graphics performance.
If you have completed all the steps up to this point correctly, you will be welcomed in a few seconds by your freshly configured Android X86. I hope you were able to follow my instructions without any problems. If you still have questions, suggestions or tips for the use of Android on PC, notebook or netbook, then write me a comment!
Best regards,
Raffi