 To develop my programs and web applications I mainly use two editors/IDEs. For the former I use the wonderful Visual Studio, and for the latter – Sublime Text, the editor that I cannot do without ever since I first discovered it. If you still don’t know what Sublime Text is, you should download the free unlimited demo version. I bet a few among you will switch to it from your editors!
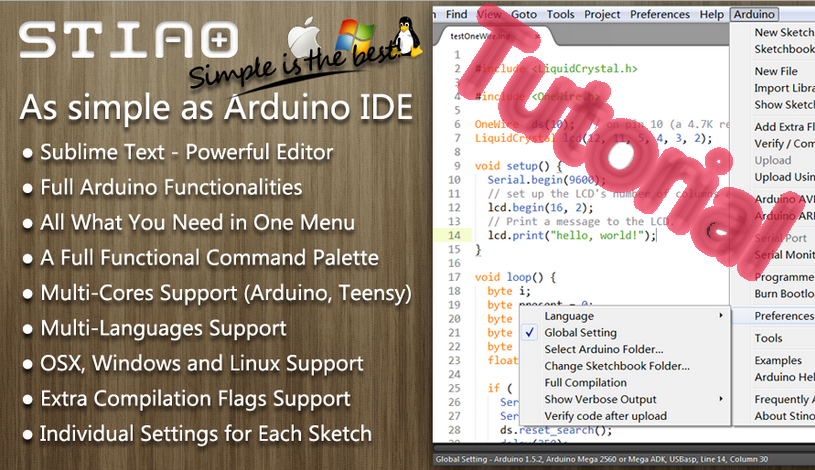
But that’s not going to be the topic of this post. See, when I worked on my Arduino projects before, I was bound to Arduino’s standard IDE, which, in all fairness, wasn’t exactly eye-candy and needed getting used to. The good news? Recently it became possible to develop for Arduino in Sublime Text. From coding, to compiling, to uploading onto the actual Arduino. Even the serial monitor is available in Sublime Text. All that is possible thanks to a plugin for Sublime Text called Stino.
This article will tell you how to install Stino, configure it and write your first Arduino sketch.
Installing Stino for Sublime Text
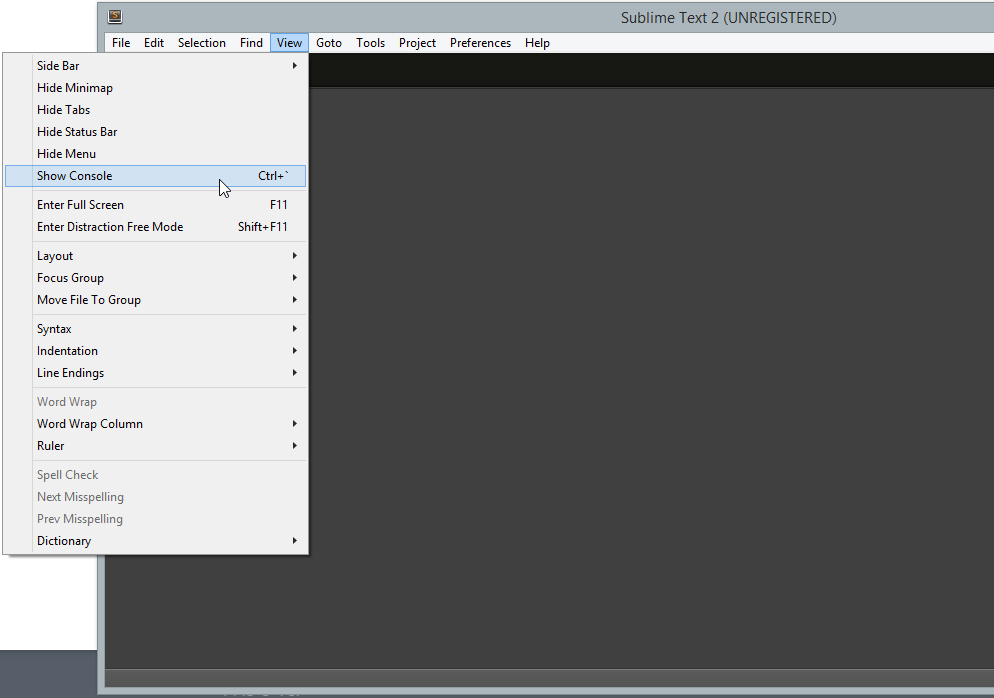
First you need to install the Package Control plugin for Sublime Text. It’s available both for version 2 and version 3 for free. To do this, click View in the menu bar and click Show Console. Once the console is open, open the browser of your choice and go to the Package Control website.
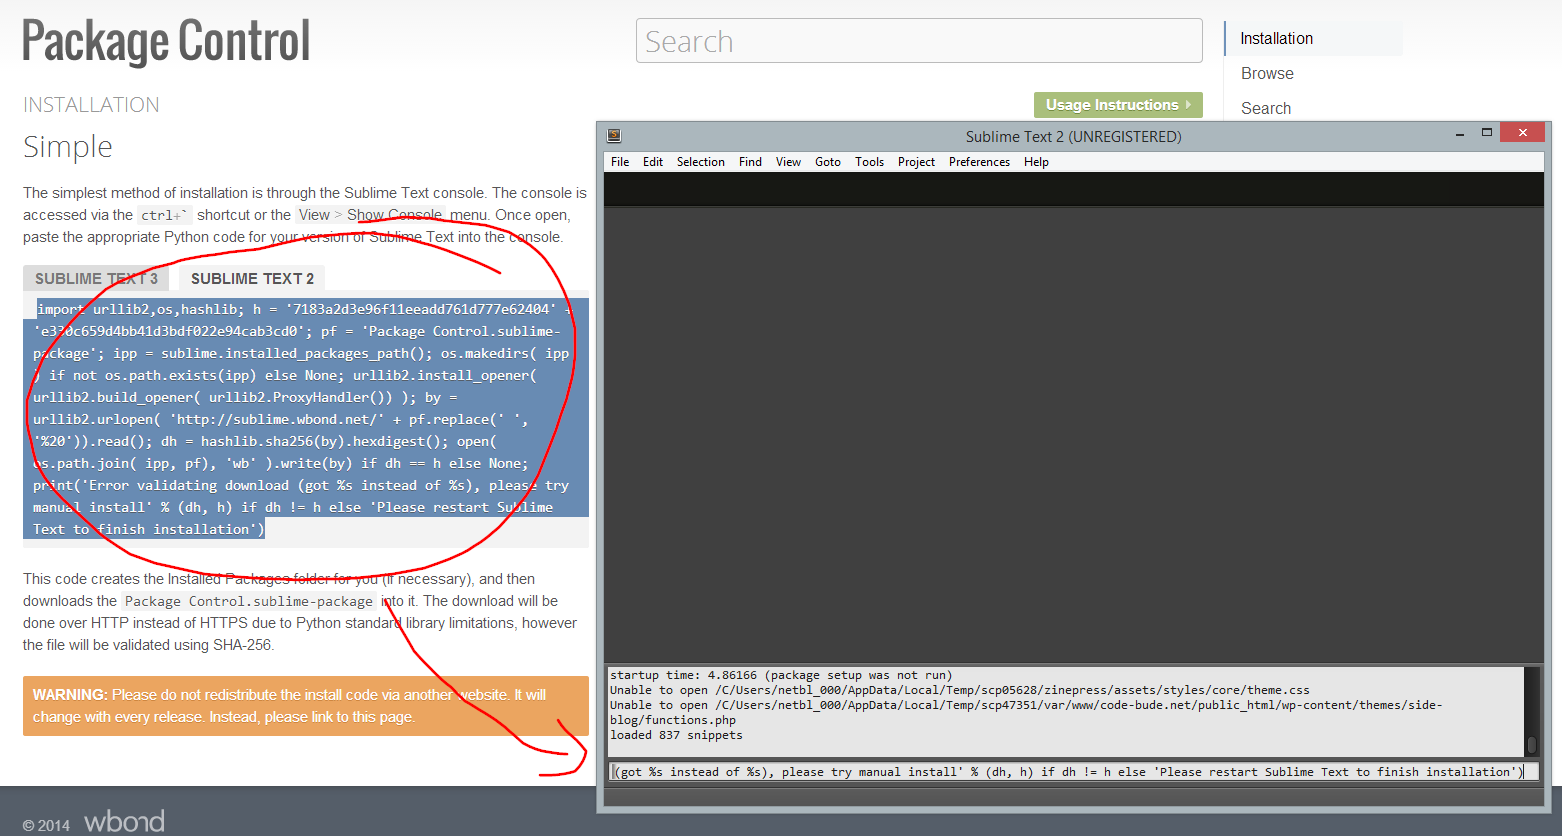
On the left side of the page you can select which version of Sublime Text you’re working with – version 2 or 3. Once you selected the correct version, copy the entire code presented in the text field and paste it into the console window opened earlier. Now press the Enter to begin installation.
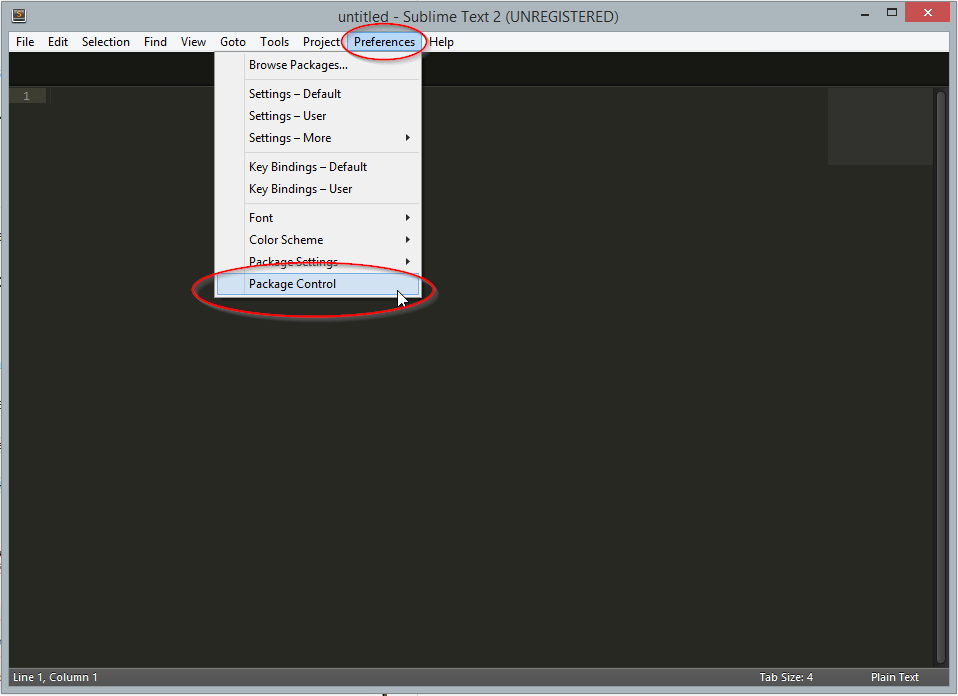
Once the installation is complete, restart Sublime Text – you should see Package Control under the Preferences menu. If this is too fast for you, look at the three following screenshots that outline the entire process.
So, now that Package Control is installed, we can use it to install Stino, the Arduino plugin. Open the Preferences menu and click Package Control. In the input field of Package Control’s command window enter “install” – you should see “Package Control: install” in the field. Press Enter to confirm.

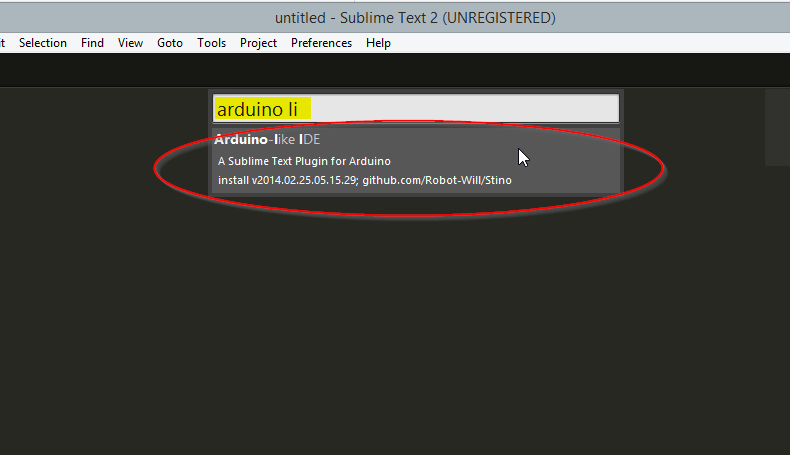
Once Package Control loads a list of all available packages, enter “arduino like” into the field and select “Arduino-like IDE”. Clicking that will begin installing Stino that will automatically complete after a quick wait. Sublime Text will have to be restarted once more after this.
Configuring Stino
Before we can finally begin, we need to edit one setting. In order for Stino to function, it needs to know the path to Arduino’s IDE. That’s right, to the original IDE. Sadly, without it the plugin won’t work correctly.
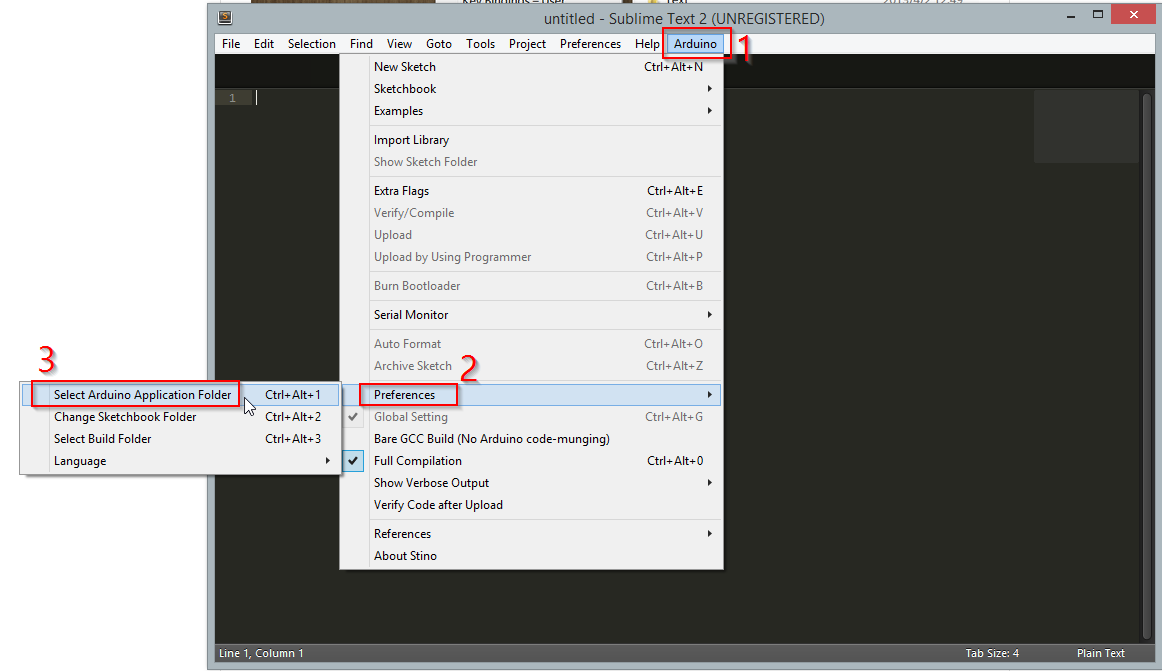
To configure the path, click on the newly added Arduino menu above, hover over Preferences and click Select Arduino Application Folder. You will now need to enter the path to your Arduino Installation in the selection dialogue. The usual path is “C:\Program Files (x86)\Arduino”.
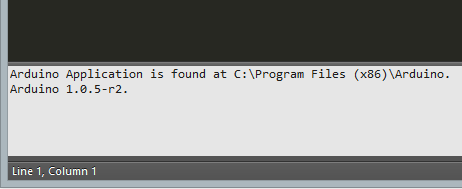
Wenn ihr den richtigen Pfad gewählt habt, dann quittiert Stino dies mit folgender Meldung: “Arduino Application is found at …”.
First steps with Stino
Now that installation and configuration are dealt with, we can finally start developing. The Arduino menu above contains everything that the default Arduino IDE had.
Clicking New Sketch will create a new project, Sketchbook will show you your existing projects, and Examples has some example projects, as per usual.
Before you can use the Serial Monitor, you’ll need to explicitly select the COM port through the Arduino menu. If you open Arduino -> Serial Monitor, or press Ctrl+Alt+M, you’ll be able to configure the baud rate and start the monitor.
Once your code is ready for upload, you will have to select the type of Arduino you want to run your code on. This can be done by going to Arduino -> Arduino AVR Boards. Now that the board type is selected, the upload (and compilation) can be started in the menu or by pressing Ctrl+Alt+U.
Conclusion
I’m personally very happy with Stino – it completely replaced the classic Arduino IDE a couple of days ago for me, and I still haven’t had the need to open the standard IDE. The programming process itself is pleasantly simplified thanks to the functions that Sublime Text provides, which means I work more efficiently – or at least I feel like I do.
Now I’d like to hear from you. Have you known about Stino before, or have you seen it for the first time in my article? I’d like to know what you think of Stino, if it’s easy to use for you and whether you know and/or use other Arduino IDEs.

Hi Raffi.
Thanks to your absolutely GREAT step-by-step tutorial on how to integrate the Stino plug-in into the (fantastic) Sublime Text (v3) editor, I’m not forced anymore to create/edit/compile my Arduino sketches in the standard Arduino IDE.
If I have difficulties or questions, I will check our blog to find solutions.
I’m using Macs (have also Windows as a Virtual machine on my Mac, and Linux too!!)
Anyway, thanks again and keep up the good work!!
Robbert / PA3BKL (yes, I’m a radio-amateur)