When it comes to secure file transfer, one or the other of you should probably have heard of the SFTP-client named WinSCP. WinSCP enables the secure transfer of data between two computers based on either the SSH protocol or the SFTP protocol and provides, as also many of the normal FTP-clients do, the functionality of editing files directly on the server (respectively edit them direct out of the WinSCP interface without the premise to manually download the files before editing).
Unfortunately WinSCP will open all text files in his own simple style editor. But if you want to edit script files like PHP scripts, which is what I want to do most times, you will miss the comfort of a good text editor like Notepad++ or Sublime Text. But don’t worry – there’s a solution also for this problem, so that you don’t have to give up your beloved features like syntax highlighting and autocomplete. How to connect WinSCP with the editor of you choice is what I’ll show to you in the following senteces. (For this article we pretend Notepad++ is our favourite text editor.)
Step 1
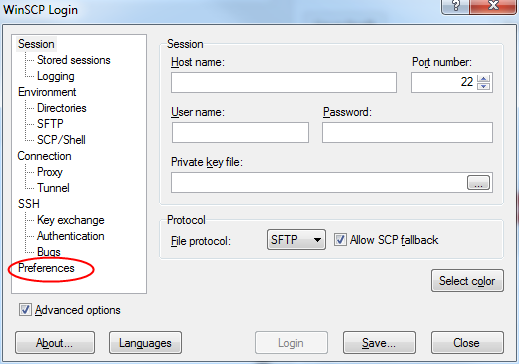

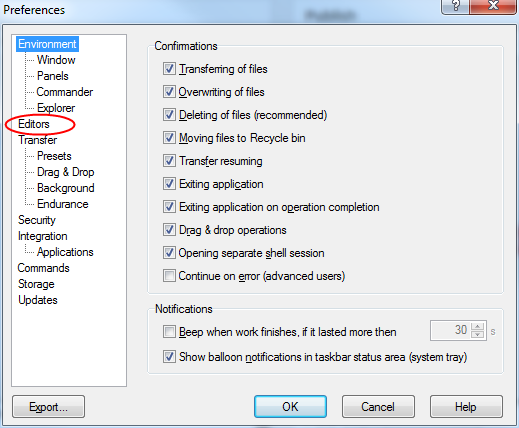
After you have opened WinSCP you will see the login screen with a tree menu at the left hand. Click on the “Preferences” menu item and then on the “Preferences…” button on the right side.
Step 2
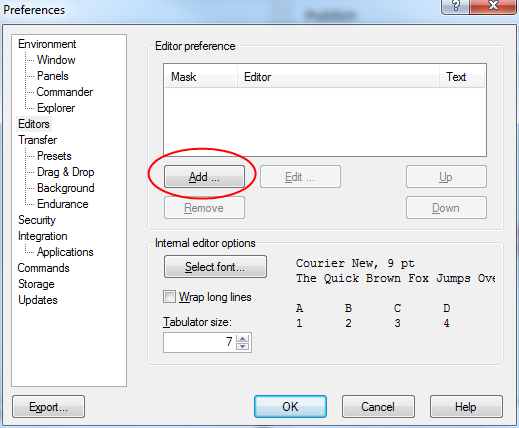
Now switch to the subitem named “Editors”. At this point you can add, edit and remove editors for different file formats. So if you have configured different editors for different file types WinSCP will open your preferred editor everytime you click on the “Edit” button in the WinSCP file manager. To add a new editor simply click on the “Add …” button.
Step 3
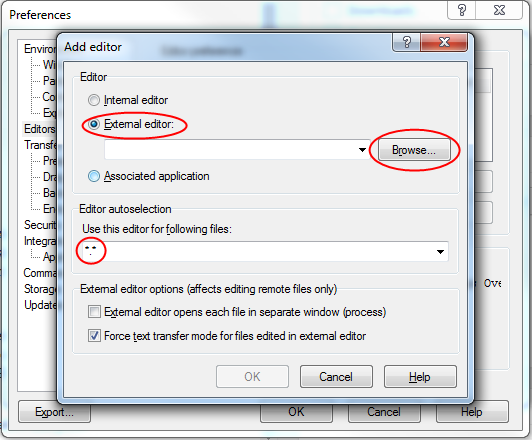
Choose the option “External editor:”, click on the “Browse…” button and select the path to the Notepad++ executable file. Now you have to define for which file types Notepad++ should be opened. If you want to use Notepad++ for all kind of file types just enter “*.*”. The asterisks are acting as wildcards. That means “*.*” is equally to “any-filename.any-filetype”. If you want to use Notepad++ only for PHP files you should enter this “*.php”.
Step 4
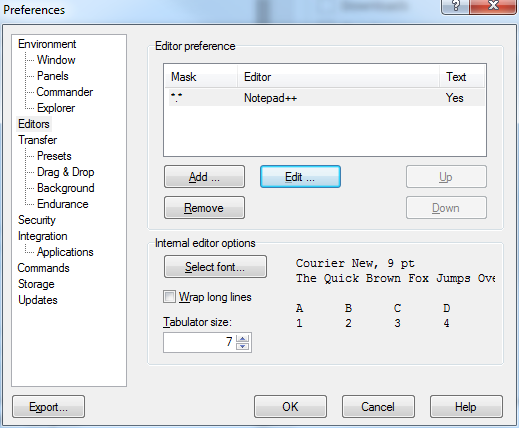
If you’ve done everything allright, Notepad++ should be available out of WinSCP from now on. To proof if everything is ok, open WinSCP and log into one of your servers. Now rightclick on any (text-)file and click on the “Edit” menu entry and WinSCP should automatically download the file and open it in editmode in Notepad++. If you’ve done your changes, save the file in Notepad++ and WinSCP will automatically upload it to the server. So that’s how coding makes fun!
I hope the article was understandable. Nevertheless, if you have any questions, just write me a comment below this post.