Also, if I rent my webspace (and now my VPS) always from german companies, my domains are with a foreign supplier. Specifically at Namecheap.com. This has several reasons. I’ve only had good experience there, I really like their web interface, the payment by Paypal and also the support is really fast.
One of the features which suits me very well at Namecheap.com is the possibility to use DynDNS with all domains registered there. And moreover it’s free. With other providers, you pay for it often.
How to configure a domain on Namecheap backend, so that the DNS records can be updated automatically, I want to show you in the following.
Configure domains with Namecheap for use with DynDNS
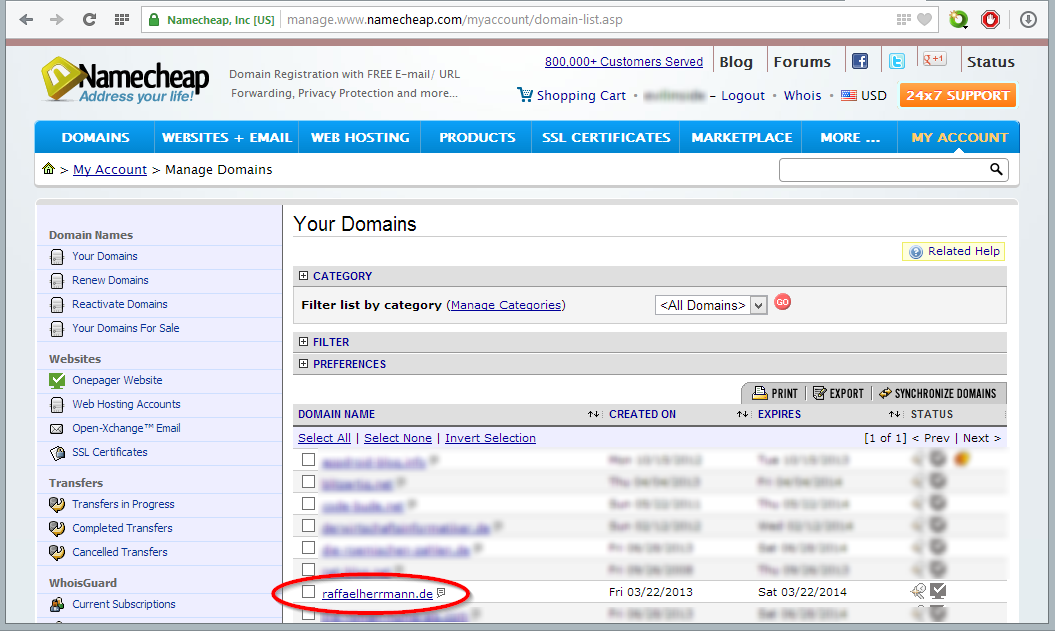 In the first step you log into your account at Namecheap.com. Then select the domain for which you want to enable the DynDNS service.
For this article I’ll choose raffaelherrmann.de, the domain of my portfolio page.
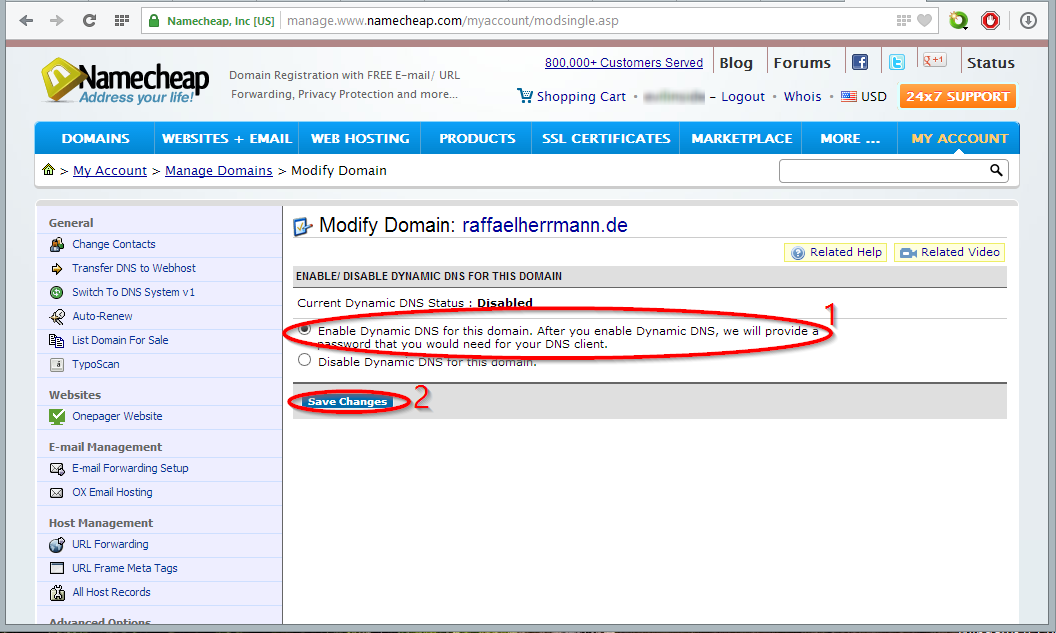
In the next step you have to click on the “Dynamic DNS” menu item in the left-hand menu. At this point, we can enable the DynDNS service. Have a look at the three screenshots below. (The screenshots can be enlarged by clicking them!)
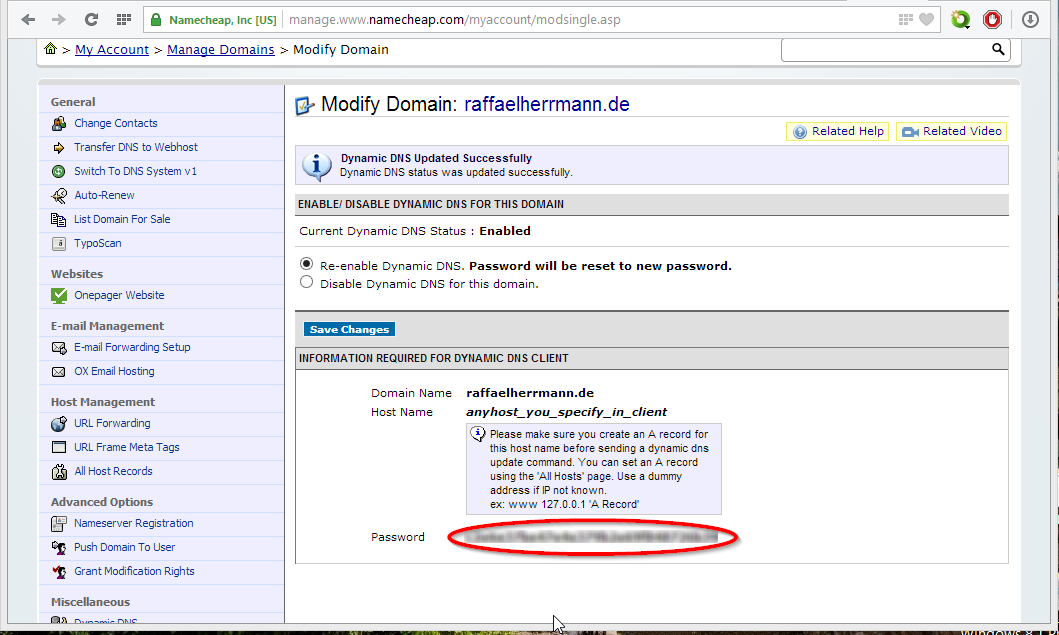
After enabling the DynDNS option and click on “Save changes”, you get your personal password. This password will be needed later to update the DNS records. It is not necessary to write it down for now, because it can be accessed/viewed via the menu “Dynamic DNS” at any time.

In the last step we need to create a subdomain, whose DNS entry we want to update, because I do not want to change the entries for the main domain (raffaelherrmann.de), as the underlying website is indeed on a web server with a static IP of course.
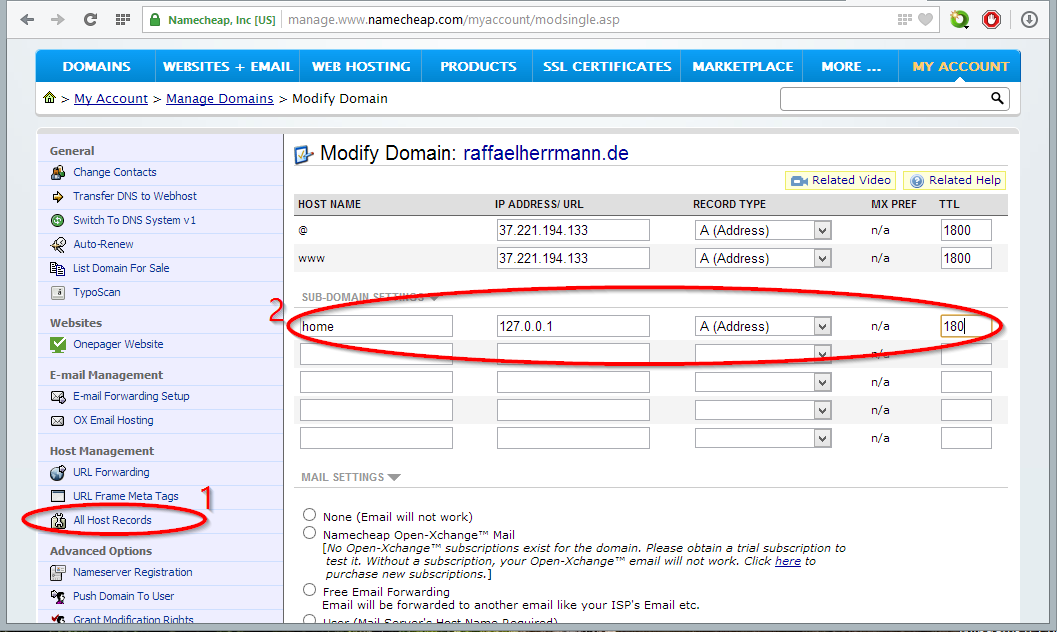
The subdomain that I put here for this blogpost is called “home” and therefore can be reached via http://home.raffaelherrmann.de. The type of the entry is “A (Address)” and you can fill it with 127.0.0.1 for the moment. The IP will be updated automatically later.
With TTL (time-to-live) I have entered 180. This is equivalent to 180 seconds or 3 minutes. Practically, this means that the entry is valid for 3 minutes or, conversely, that after your IP changes and an update request was send, at latest after 3 minutes DNS records will be updated.
Setting up a DynDNS client
By Namecheap.com now everything is configured. In the next step a client must be set up to provide the Namecheap DynDNS system with the “fresh” IP. Because I want to show two options here, I have this outsourced in two separate short articles. Clicking on one of the links below will take you to the corresponding tutorial.